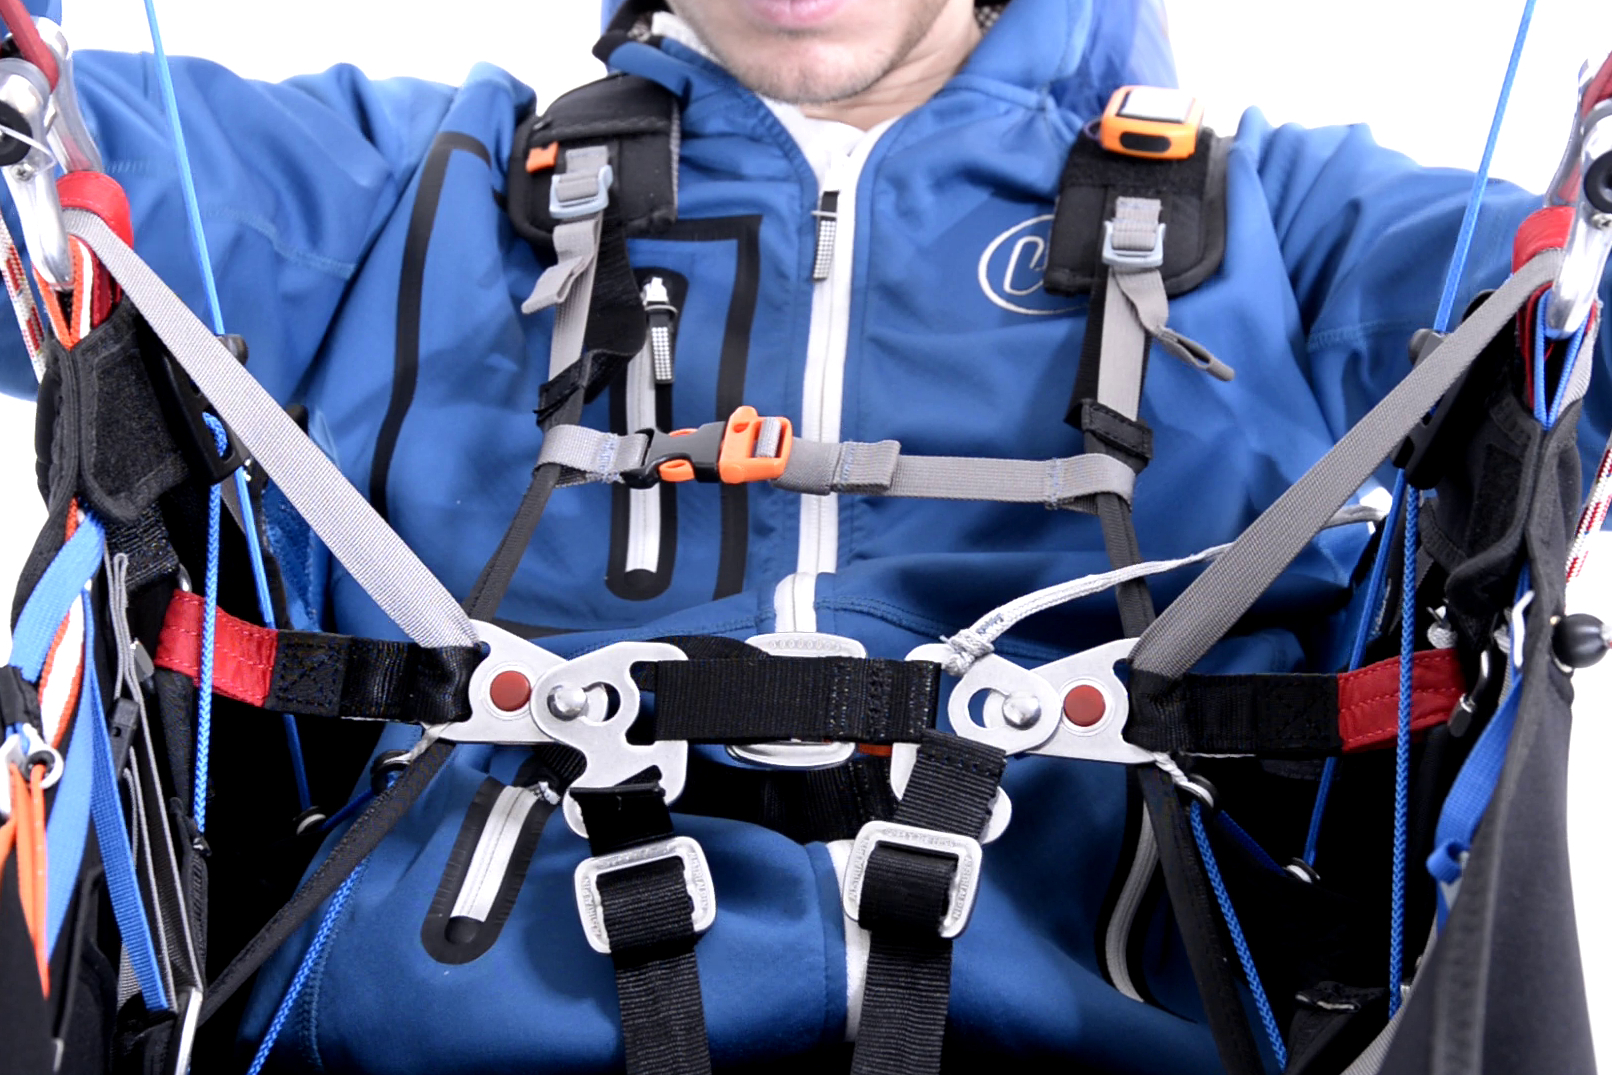
How to adjust your harness (General)?
The harness is not just the "seat" that supports the paraglider pilot under the wing. It is also and above all a technical instrument that enables the pilot to interact with his wing, to feel the air mass, to accompany the movements of the wing and to pilot it.
From this basis, it is easy to understand that the harness must be adapted to the pilot so that he can be one with it and use it to its full potential.
For this purpose, harnesses are equipped with many adjustments that will appear complicated at first glance, but all of them really do have a useful function.
Each pilot has his or her own morphology and personal feelings. It is therefore essential that the harness can be adjusted to fit the pilot as well as possible.
We will not go into detail here about the settings available on each existing harness, but try to review the main settings and their function, comfortably installed under a test gantry.
The order below is the one recommended for adjusting the harness, assuming that they are all fully opened (loose).
Back Tilt Adjustment :
This is perhaps the most important setting, as it defines the pilot's position in the harness, and therefore with respect to his environment.
An upright position (sitting to semi-recumbent) provides a better understanding of obstacles and better observation of information coming from below.
With a more backward position (semi-recumbent to recumbent), we privilege information coming from above, such as clouds, wing movements, etc ...
Too far back, the flight can become uncomfortable (poor vision) and make it difficult to exit the harness on landing. In addition, for people who are not accustomed to this position, this will cause abdominal pain as they will tend to straighten up throughout the flight.
Too much sitting can make it harder to get into the harness after take-off.
Each pilot must therefore define the position that best suits him or her and use the relevant straps to make the adjustment.
NOTE: Depending on the weight carried in the main pocket and/or ballast transport, this setting may need to be changed in the air to restore the balance of the assembly.

Lumbar support adjustment :
Now that the back inclination is set, you need to wedge the curvature of the back to obtain a support perfectly adapted to your body. This is because the curvature of the back cannot simply be placed on a relatively flat surface. Over time, this can lead to pain and fatigue by forcing the postural muscles to remain contracted.
This adjustment is therefore very important to adjust the harness and to increase overall comfort over time.
Completely loosened, this setting does not normally apply any pressure (red zone). Once installed in the harness, the adjustment must be tightened until satisfactory lumbar contact and support is achieved (blue zone).
WARNING: do not to overdo the support, at the risk of over-curving the dorsal curvature and risking discomfort that may occur some time later.
In case of doubt or pain, do not hesitate to loosen the adjustment completely and come and look for lumbar contact.


Shoulder Adjustment :
In a harness, the shoulders have several functions:
- Hold onto the harness on takeoff.
- Limit the pilot's inclination in the air.
- Prevents the pilot from falling in the event of an upside down "flight".
- Participate in the support of the pilot in case of flight under the reserve parachute.
- Avoid backing up in the harness (especially in the prone position when accelerating) and thus changing the trim.
The shoulder adjustment should allow close but not too tight contact to maintain good shoulder mobility during take-off, landing and in the air.
However, shoulder adjustment should not intervene (need to be tight) to obtain satisfactory back support. They will never compensate for a lack of support, because too tight they compress the pilot in the harness, which will inevitably become uncomfortable in the long run.
After checking that it is possible to get in and out of the harness, the shoulders sometimes need to be adjusted in the air for more support and comfort.
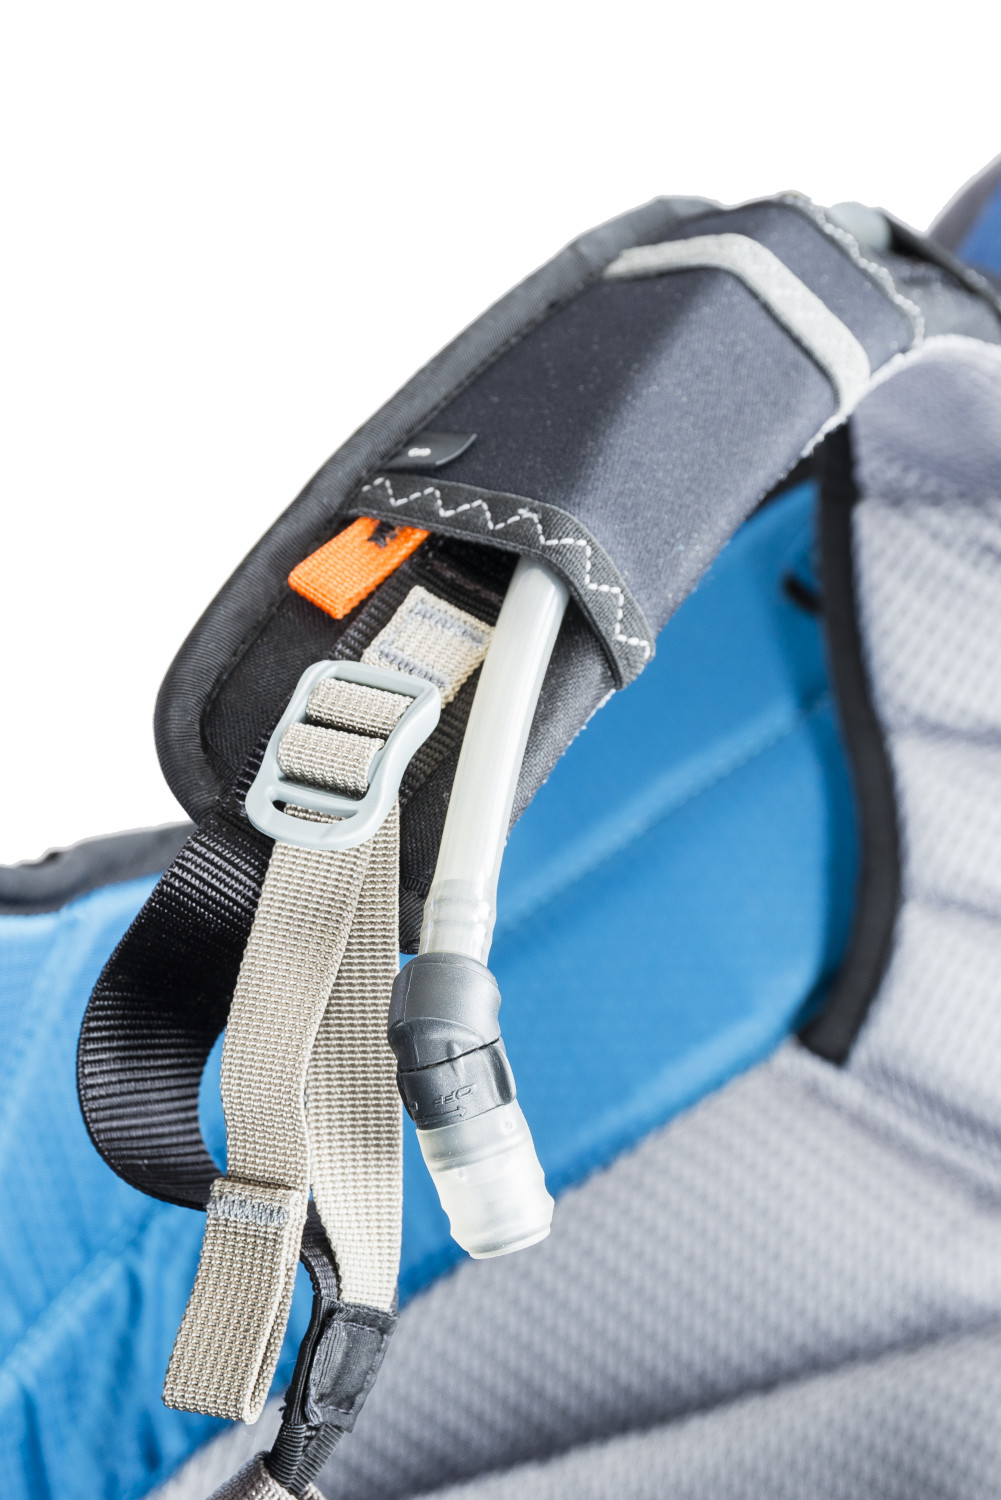
Adjusting the belly strap :
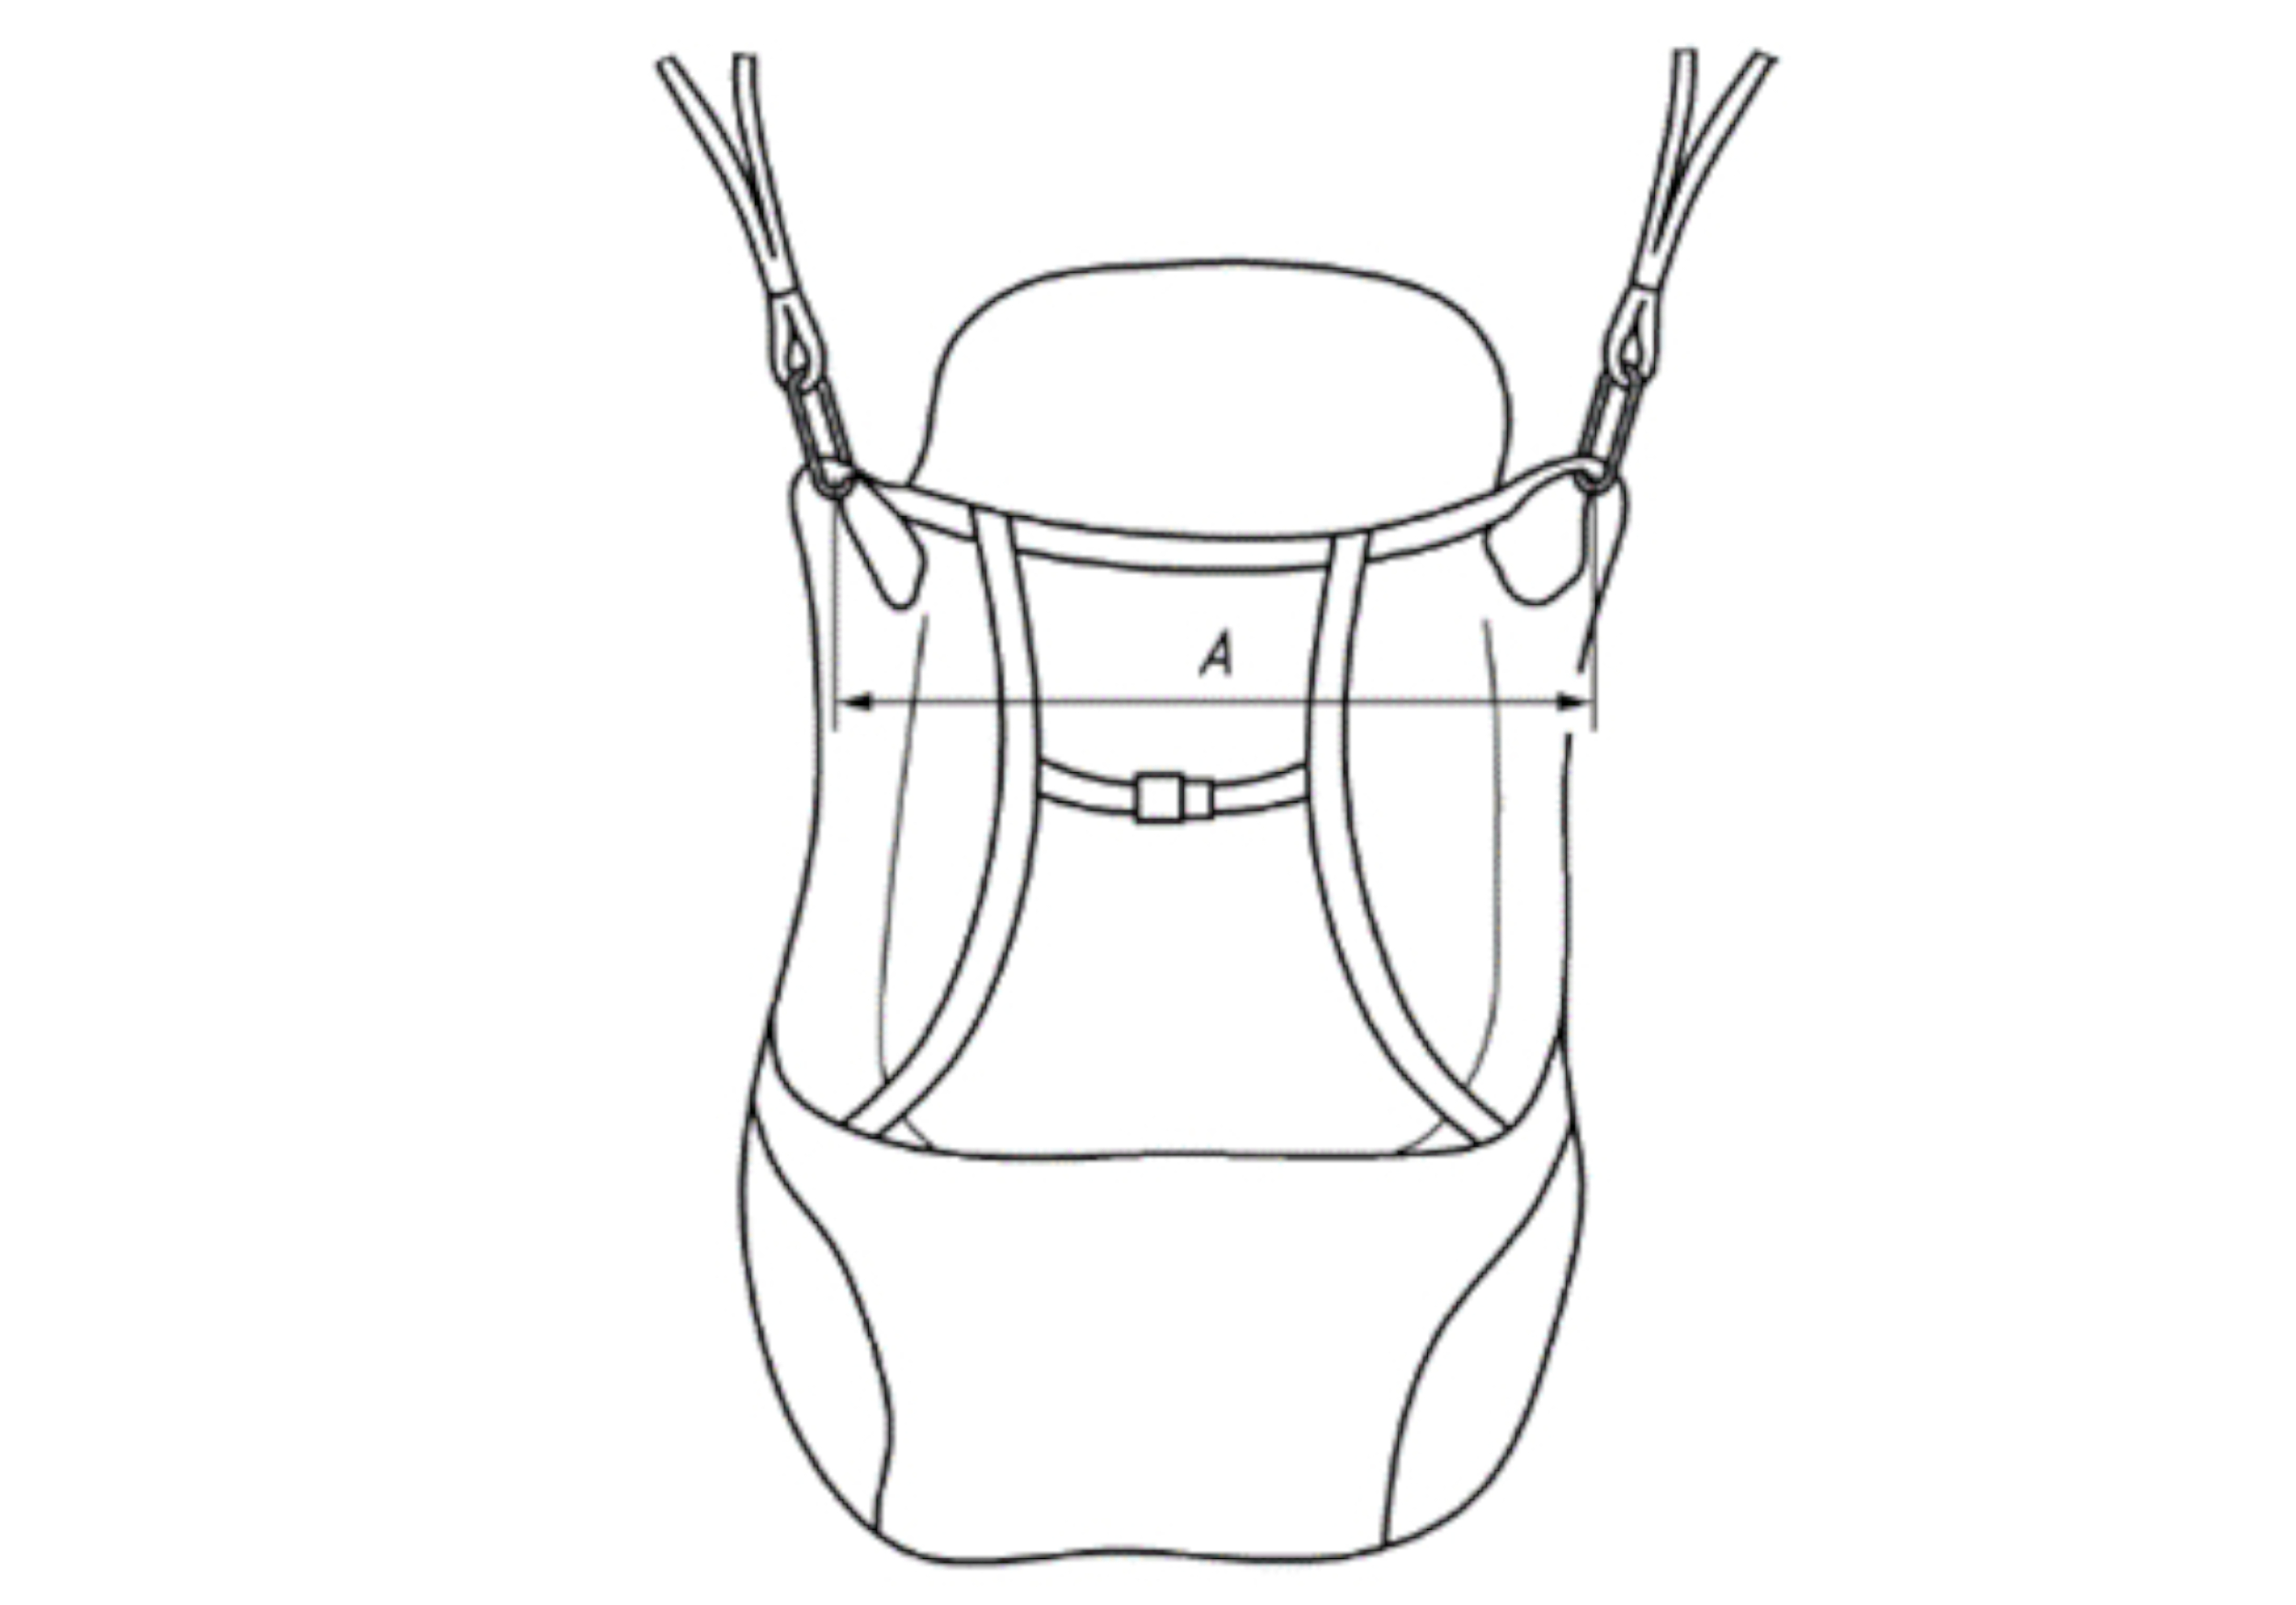
The ventral strap connects the anchor points to each other and maintains this distance in flight. The adjustment of this strap allows the risers of the glider to be positioned correctly, in order to give it its optimum lobe (and incidentally the one that has been tested and validated!).
According to EN 926:2-2013, the spacing values (measured at the top of the links/bottom of the risers) are as follows:
- PTV<80kg : 40 ± 2 cm
- 80kg<PTV<100kg : 44 ± 2 cm
- PTV>100kg: 46 ± 2 cm
The best way to perform this adjustment (which should be done at the top of the carabiners), is to prepare a line with a loop on one side (to be hung on the bottom of a riser), and a marking at the desired length from this loop. You take offr, and take advantage of a calm moment to tension the line between the risers and adjust the chest strap until the marking is at the level of the second riser.
The pilot may have to play with the chest strap adjustment to modify the stability and damping characteristics of his wing. This adjustment is intended for advanced pilots, and care should always be taken not to descend below the recommended length, as this may increase the risk of twisting in the event of a collapse.
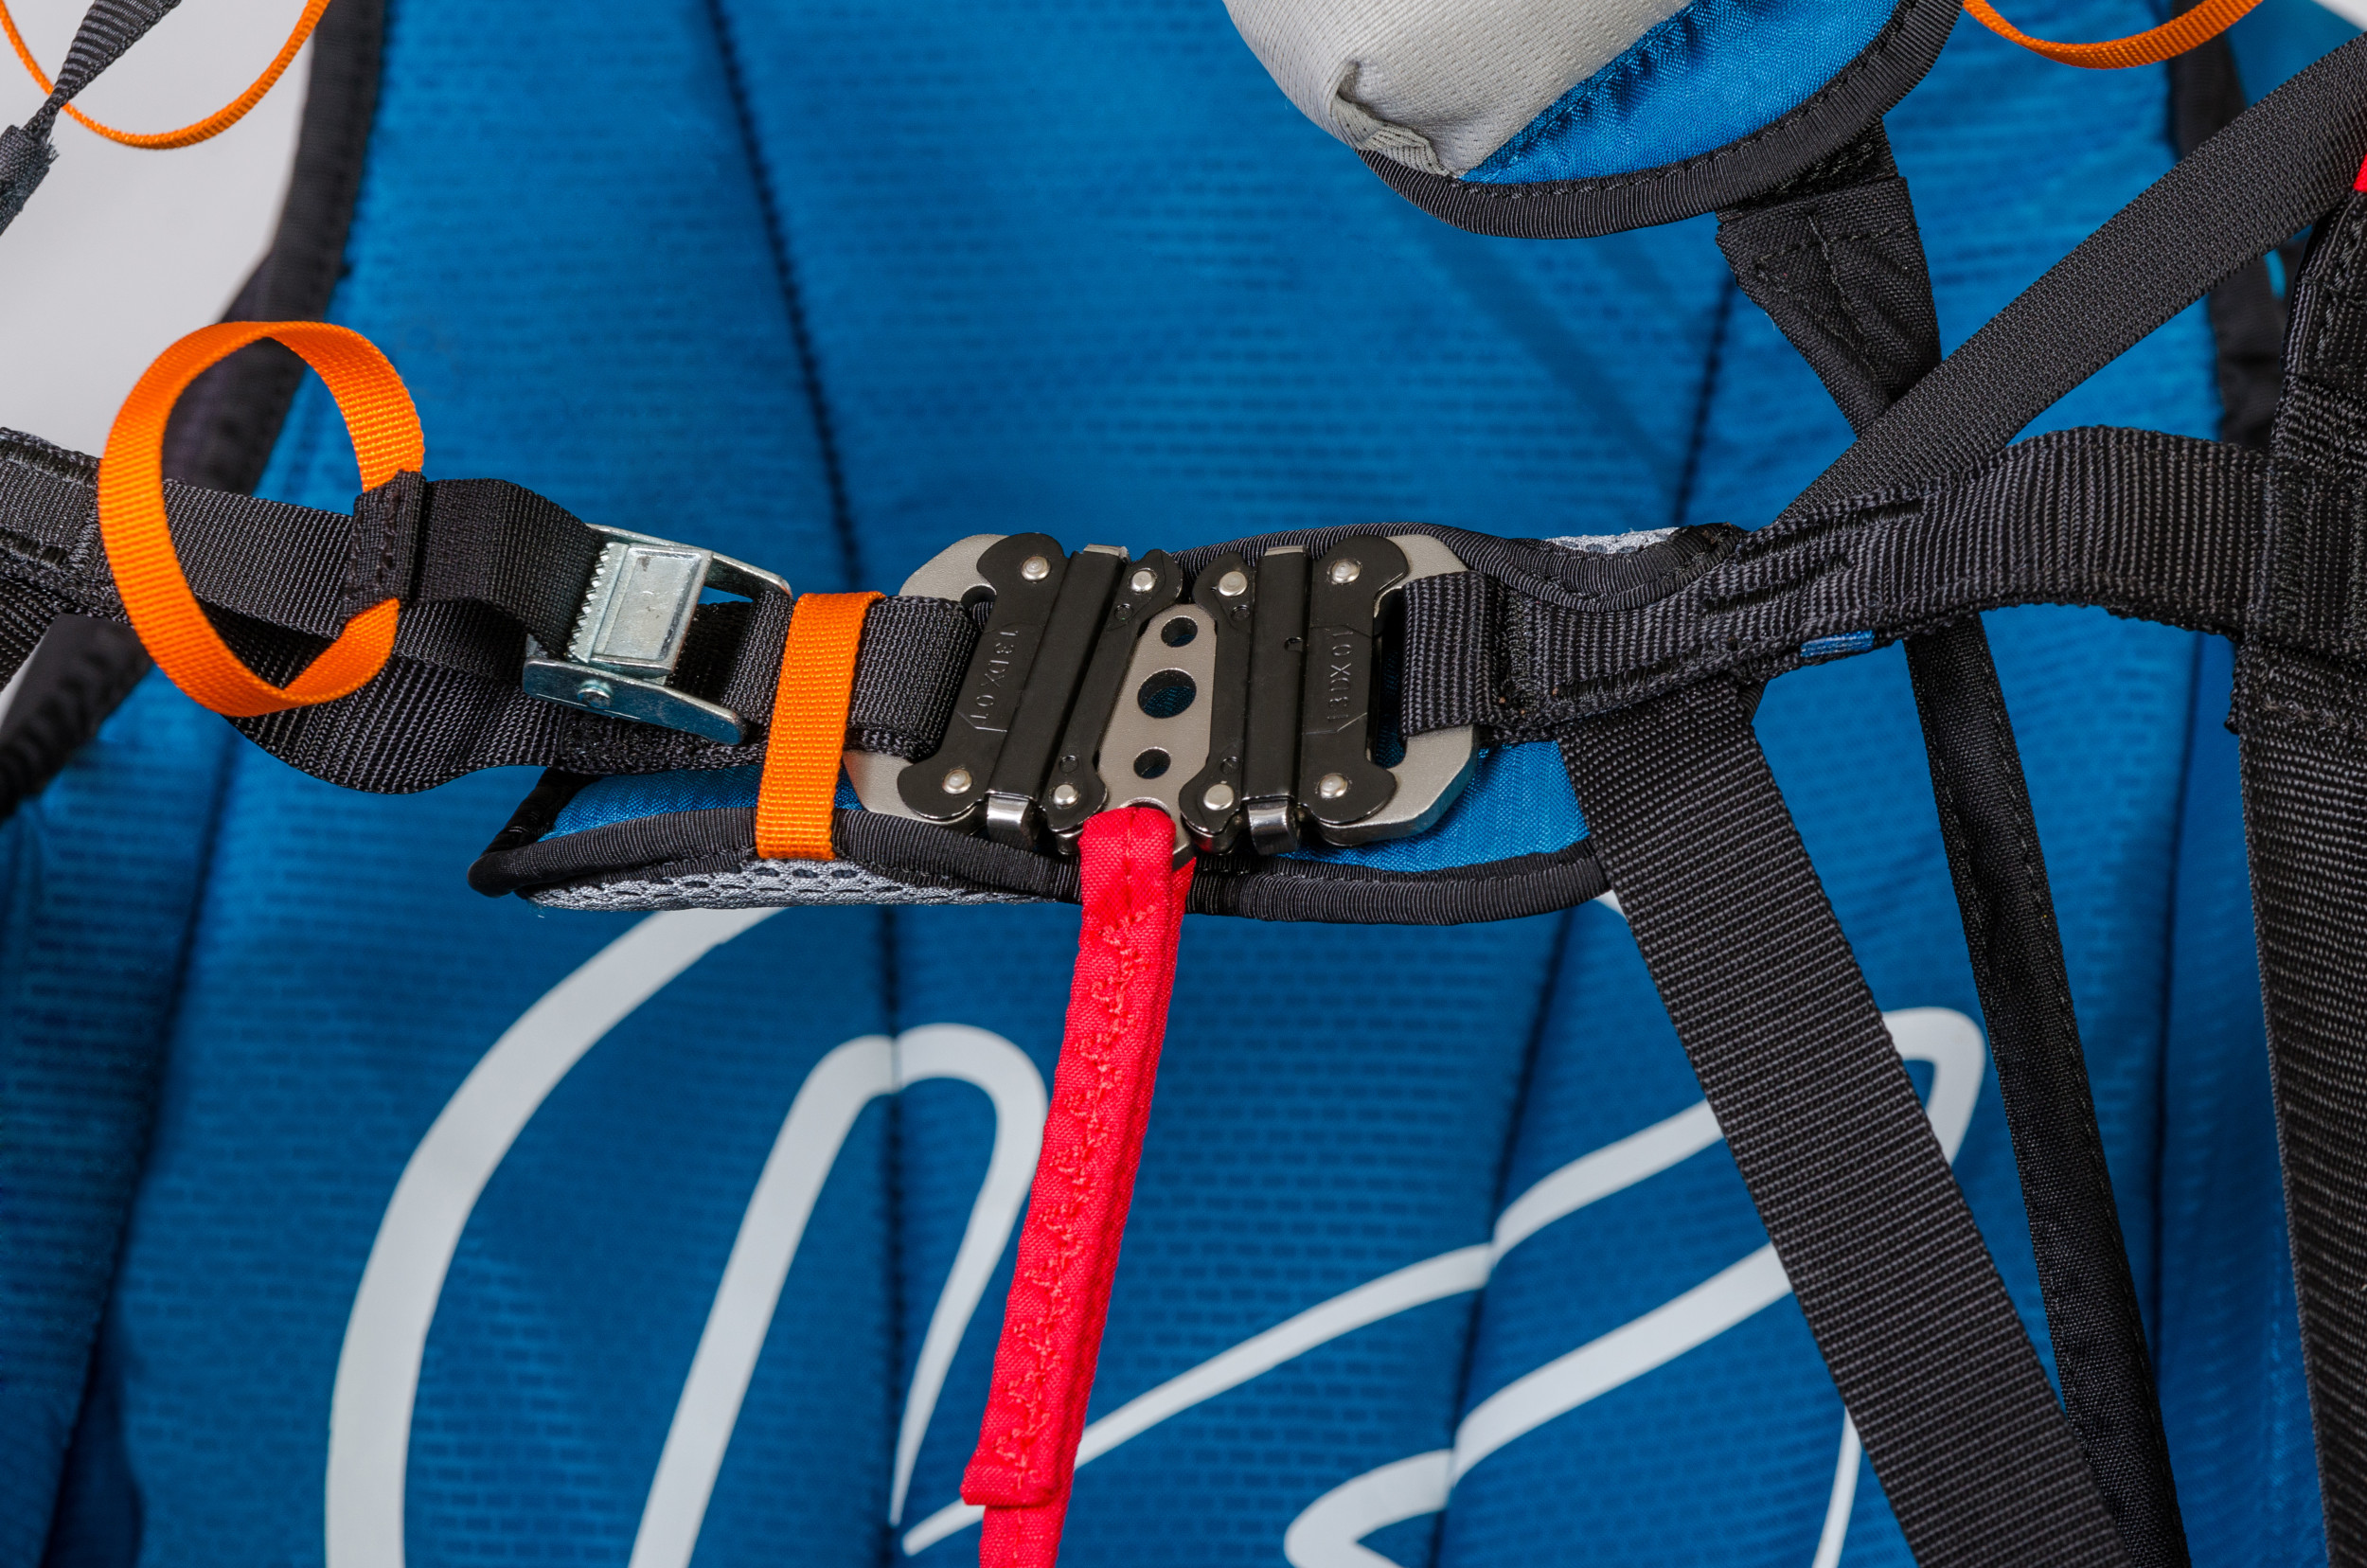
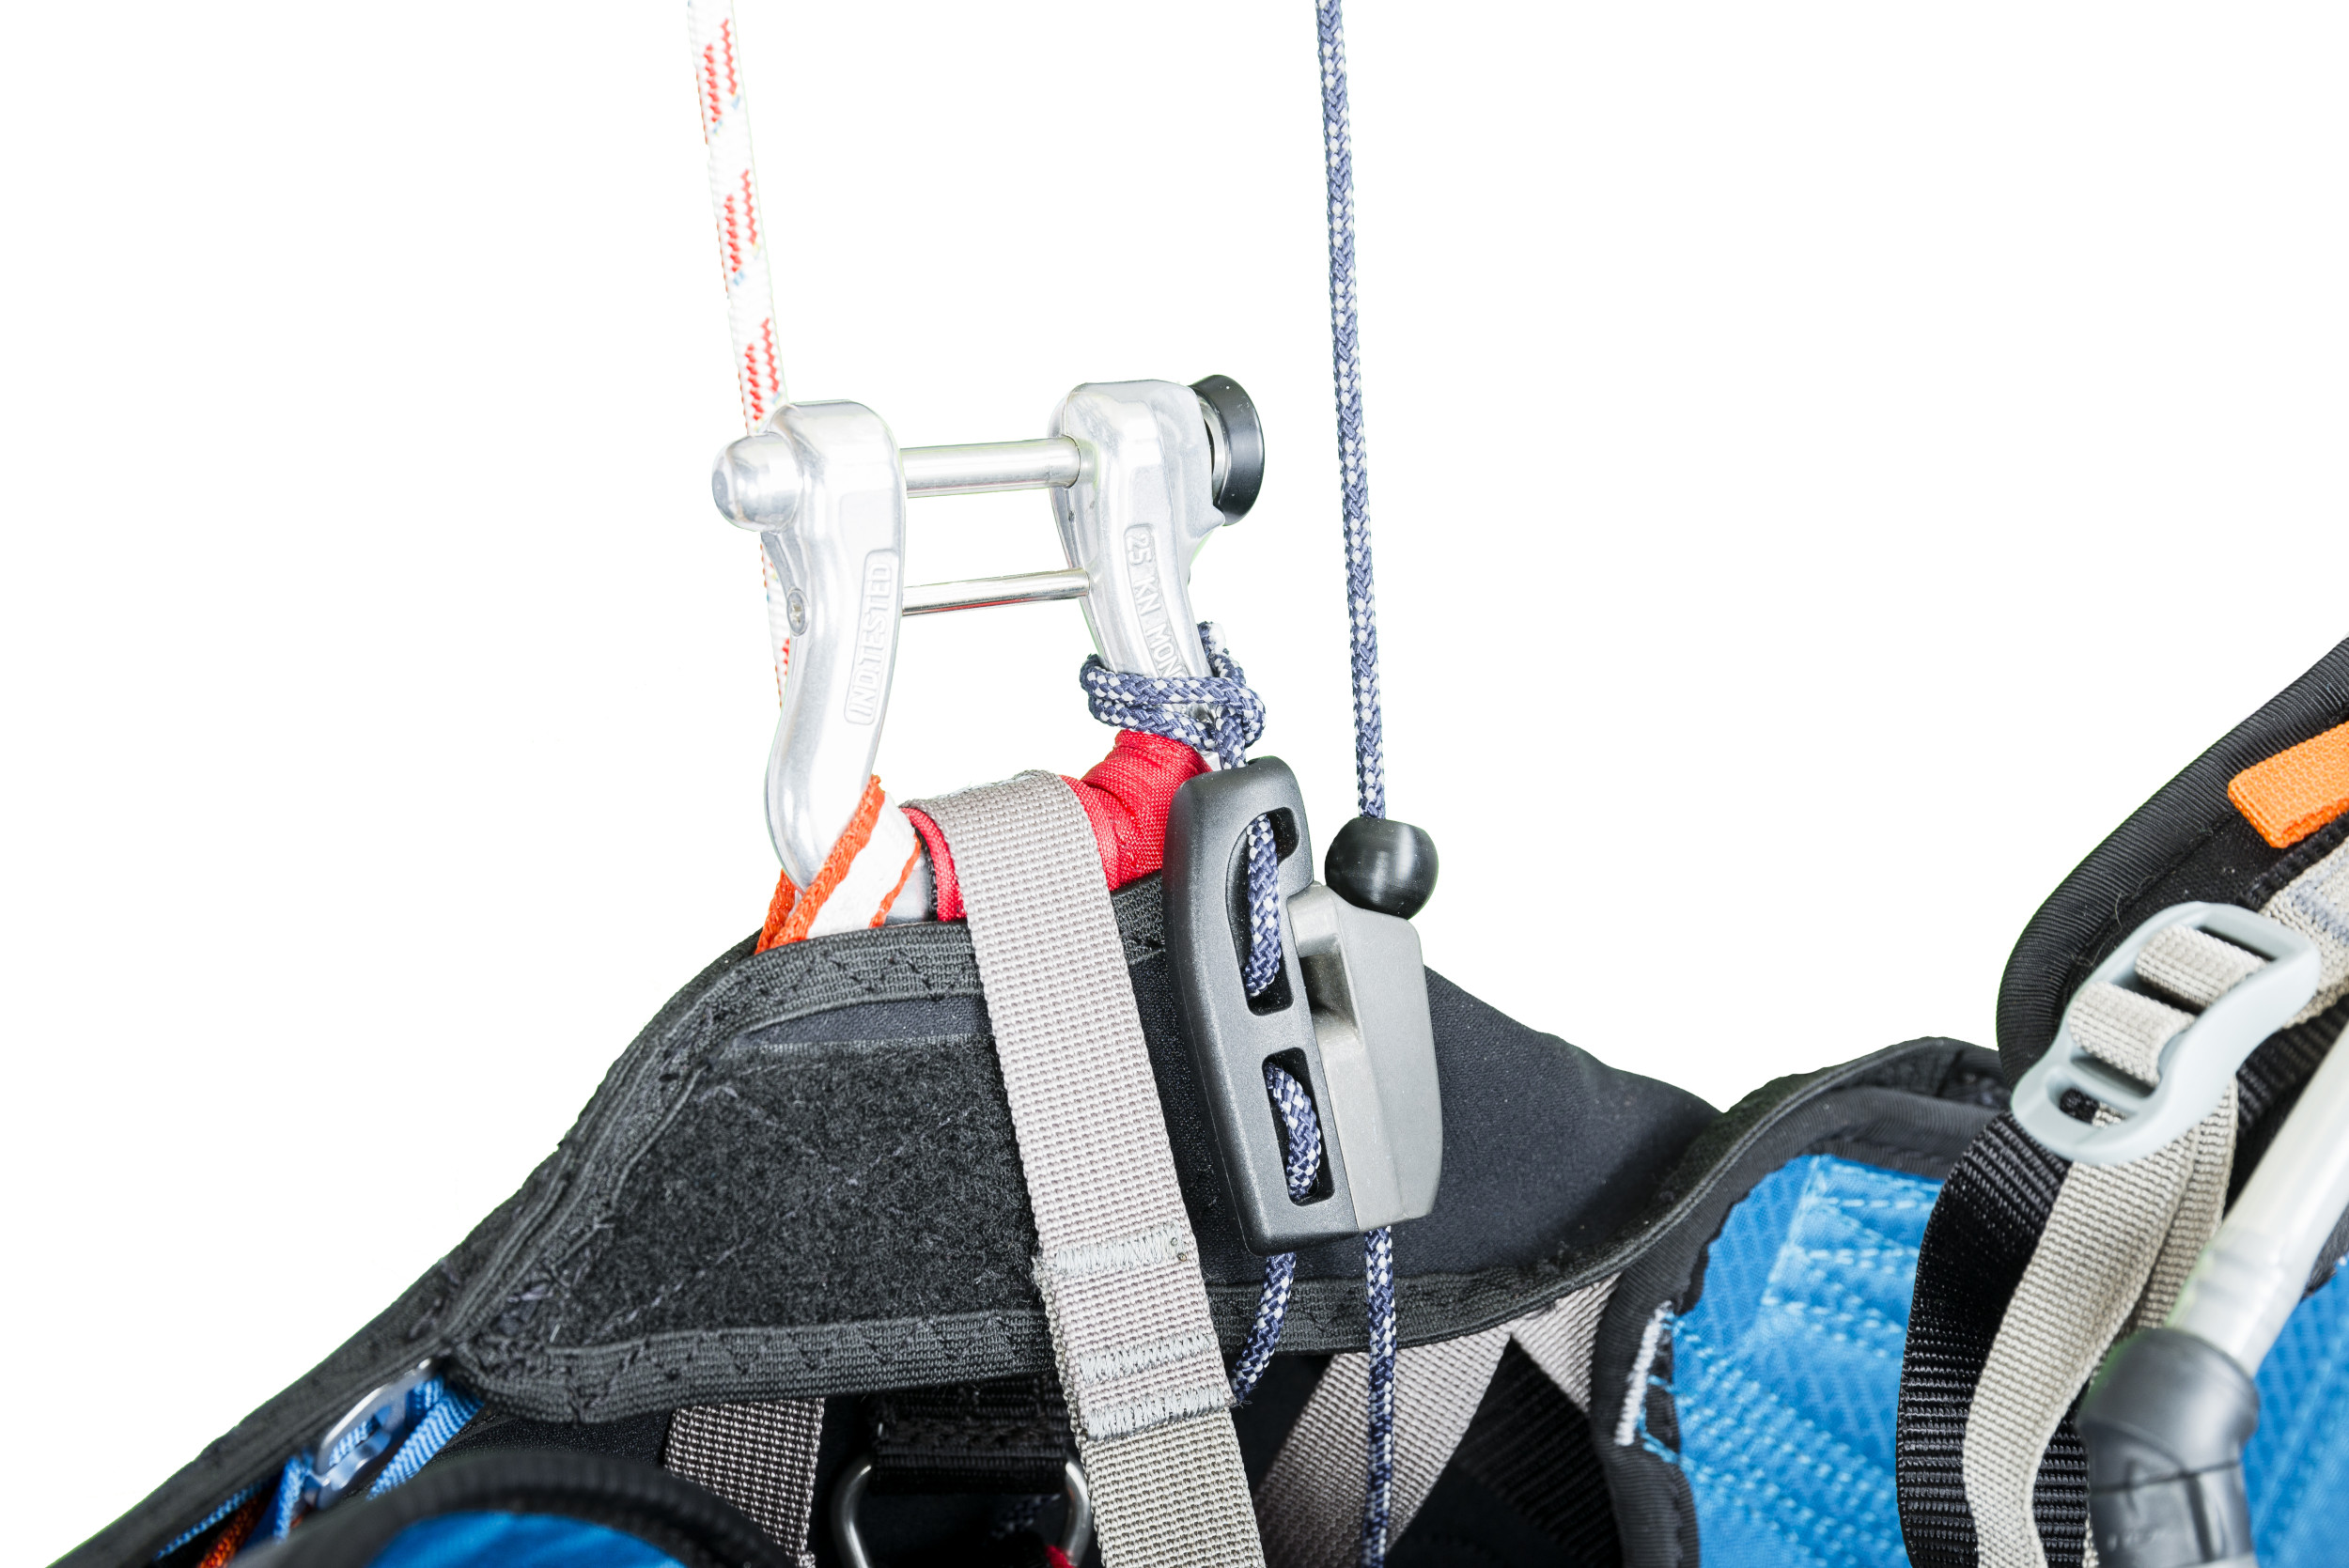
Adjusting the stabilization/damping system :
While the belly strap adjustment can also be used as a stabilizer by "bridling" the harness, it has the major disadvantage of modifying the canopy's arch by bringing the anchor points closer together, and therefore changing its flying behaviour.
For this reason, some harnesses are equipped with stabilization systems that are independent of belly strap adjustment.
These settings allow the harness to be bridled (or released) to allow it to be more or less reactive and playful. These settings are generally accessible in the air, and allow you to adjust the behaviour of the harness according to the aerology and/or phases of flight.
Adjusting the cocoon or footrest :
A cocoon (or foot wedge) keeps the legs stretched out in front of the harness, limiting the effort required by the pilot. A good adjustment therefore allows you to save on physical effort.
The correct adjustment of the cocoon (or footrest) is essential, as it has a significant influence on the seat pitch compared to a conventional seat. In a harness with a foot bar or cocoon, the semi-recumbent to reclined position should be preferred to optimise comfort.
Length adjustment must be done on a test gantry, but will likely need to be refined during the first few flights, as pilot posture and handling can vary between a calm gantry test and actual flight conditions.
The tension must be sufficient to allow the pilot to extend the legs without forcing, and the legs must be properly maintained. Excessive tension will force the pilot to stretch the legs, and generate physical fatigue that should be avoided. Insufficient tension and the pilot will have to stretch his legs to find the support, again generating an unnecessary effort.
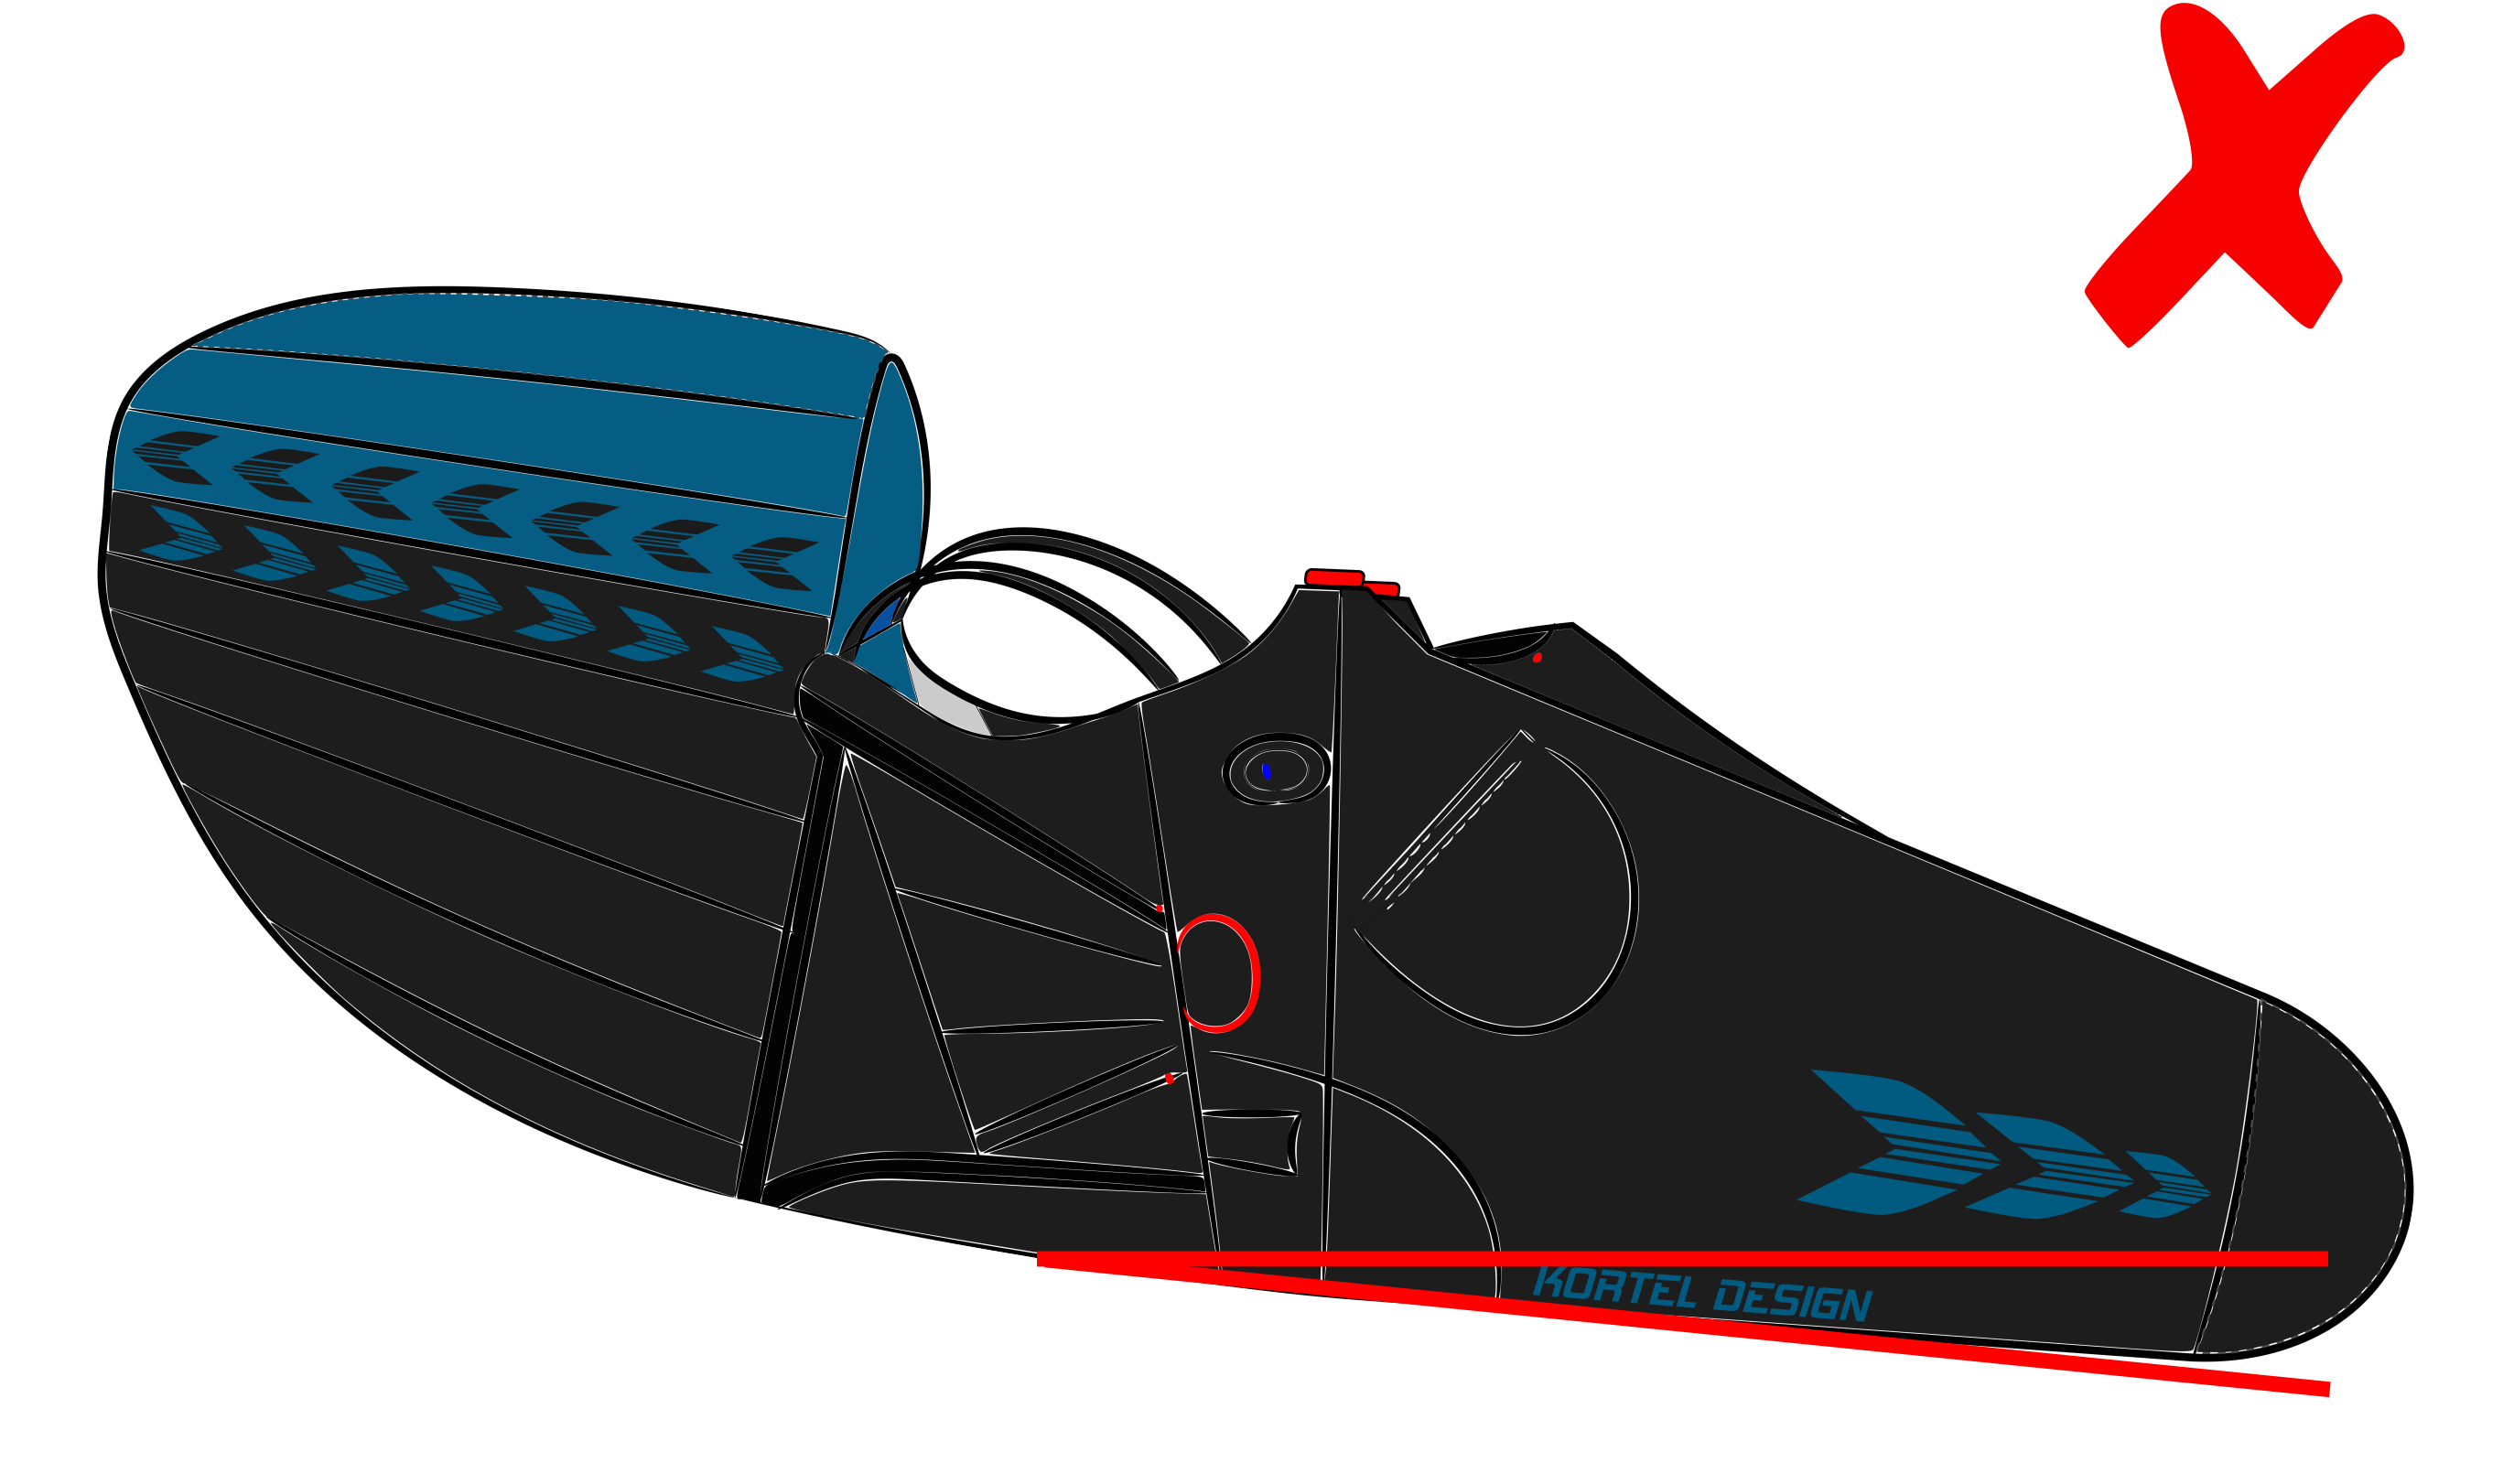
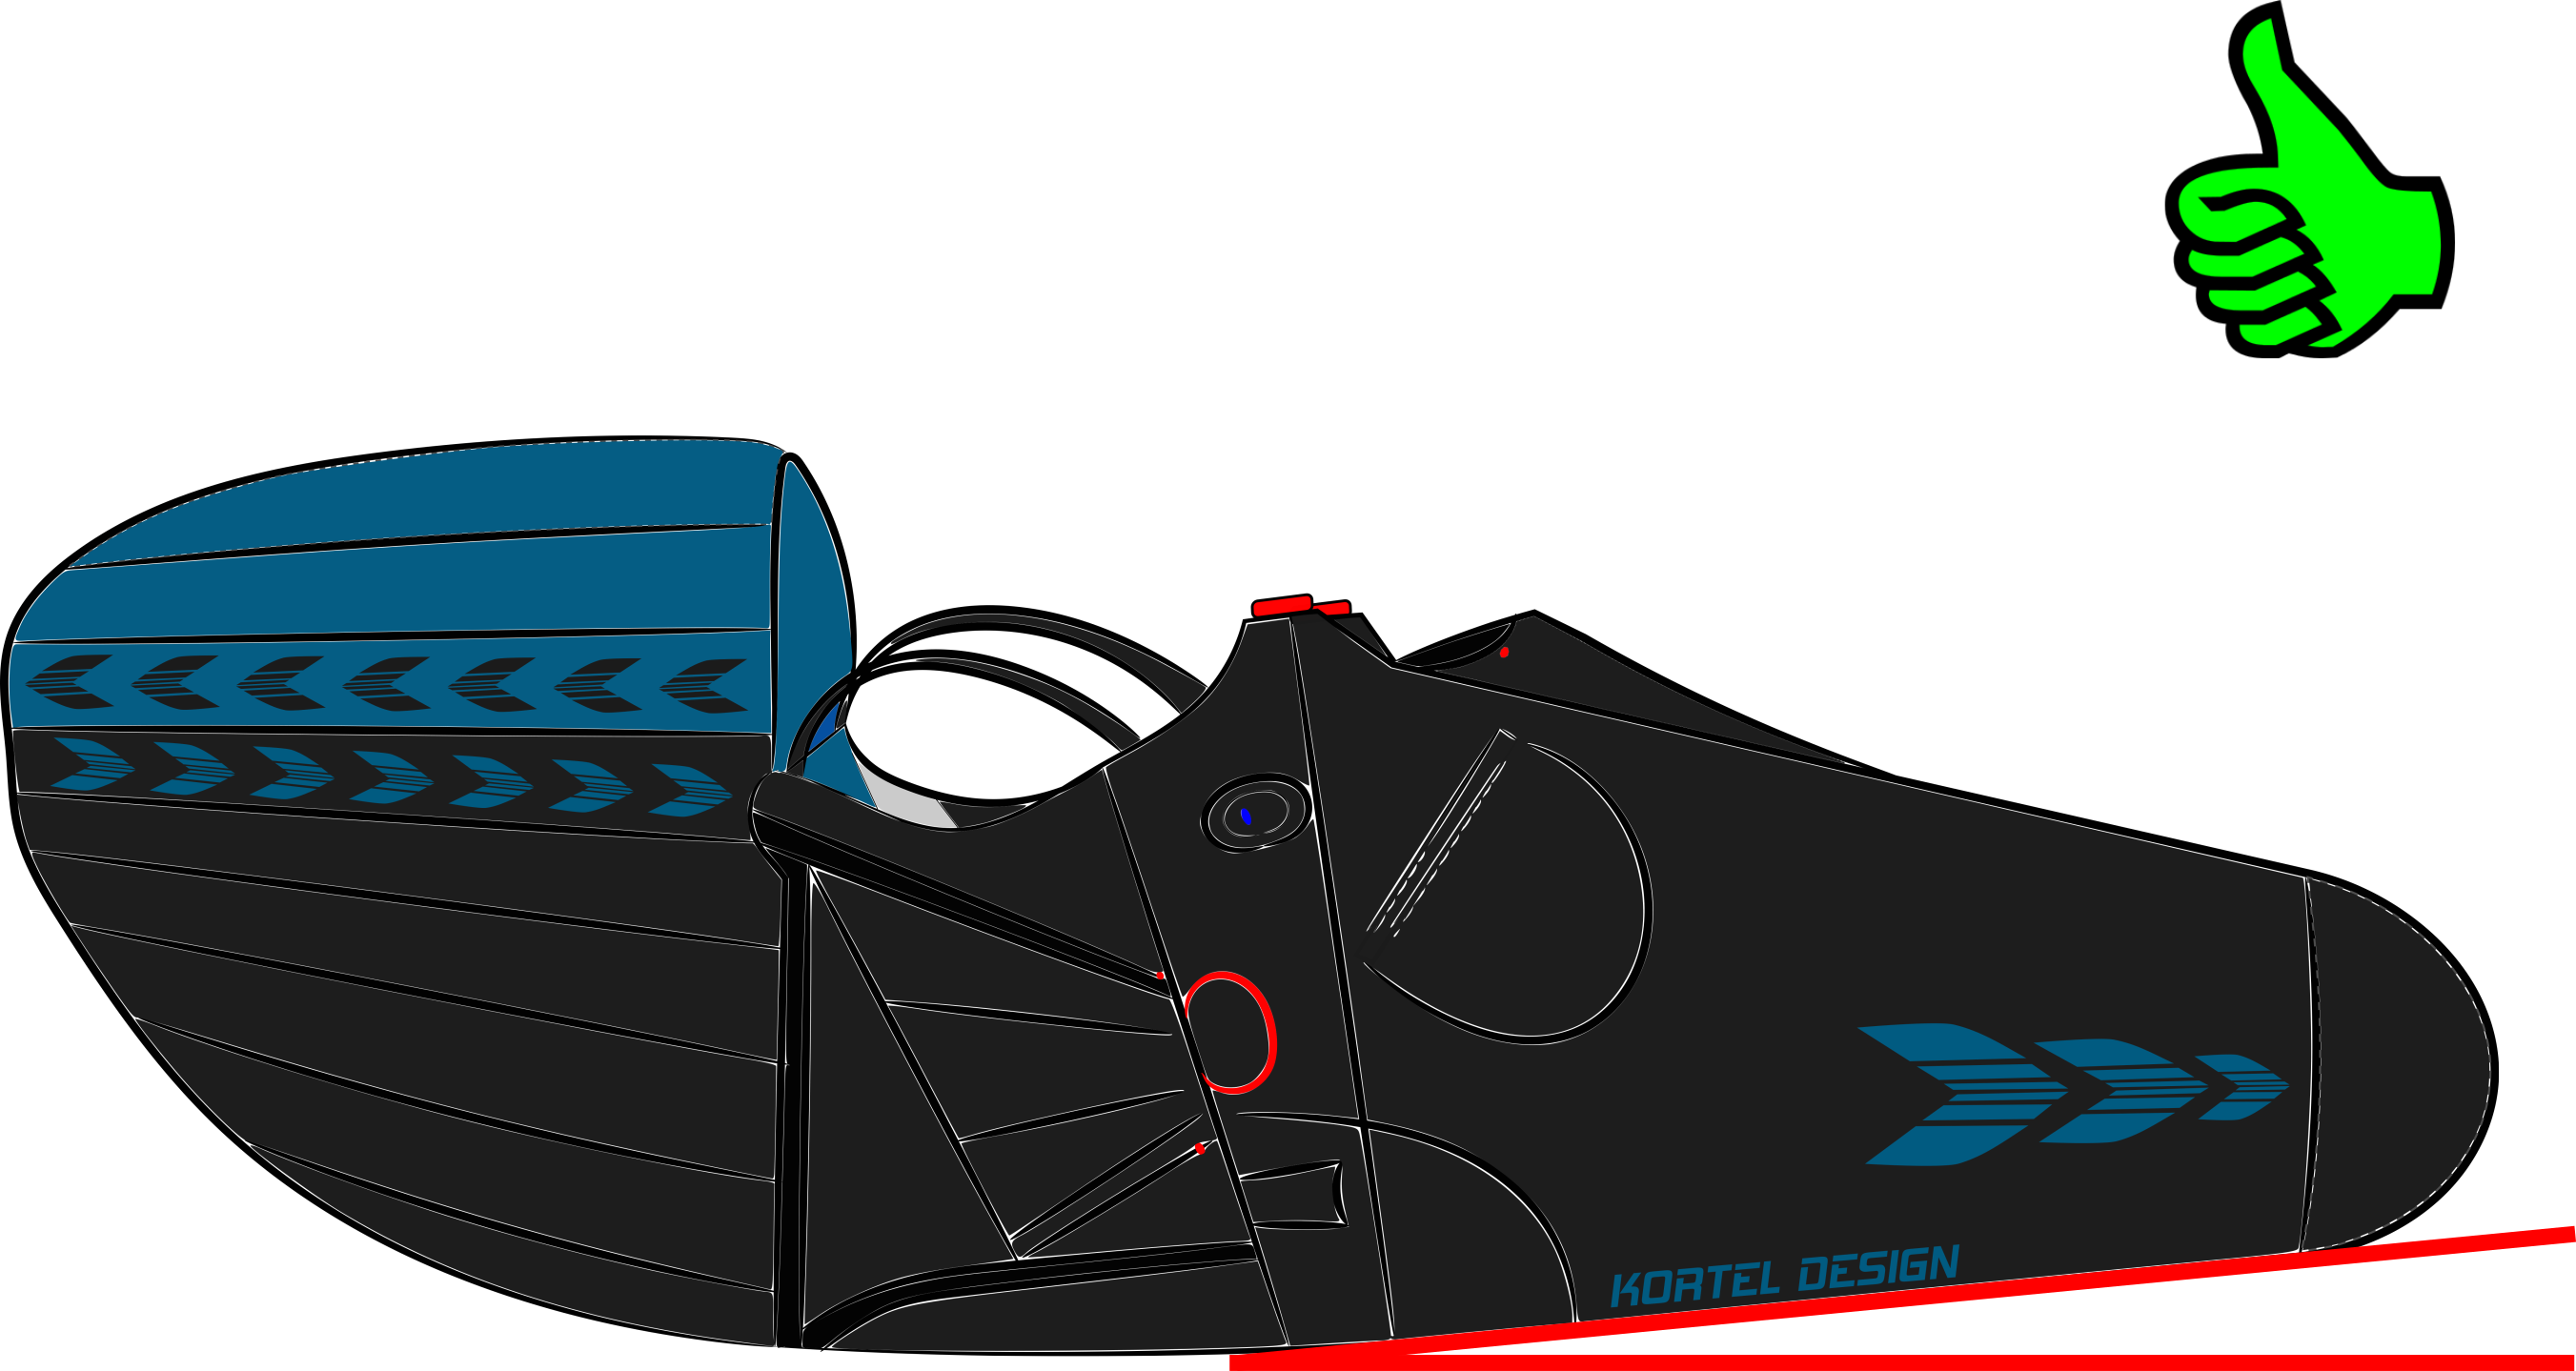
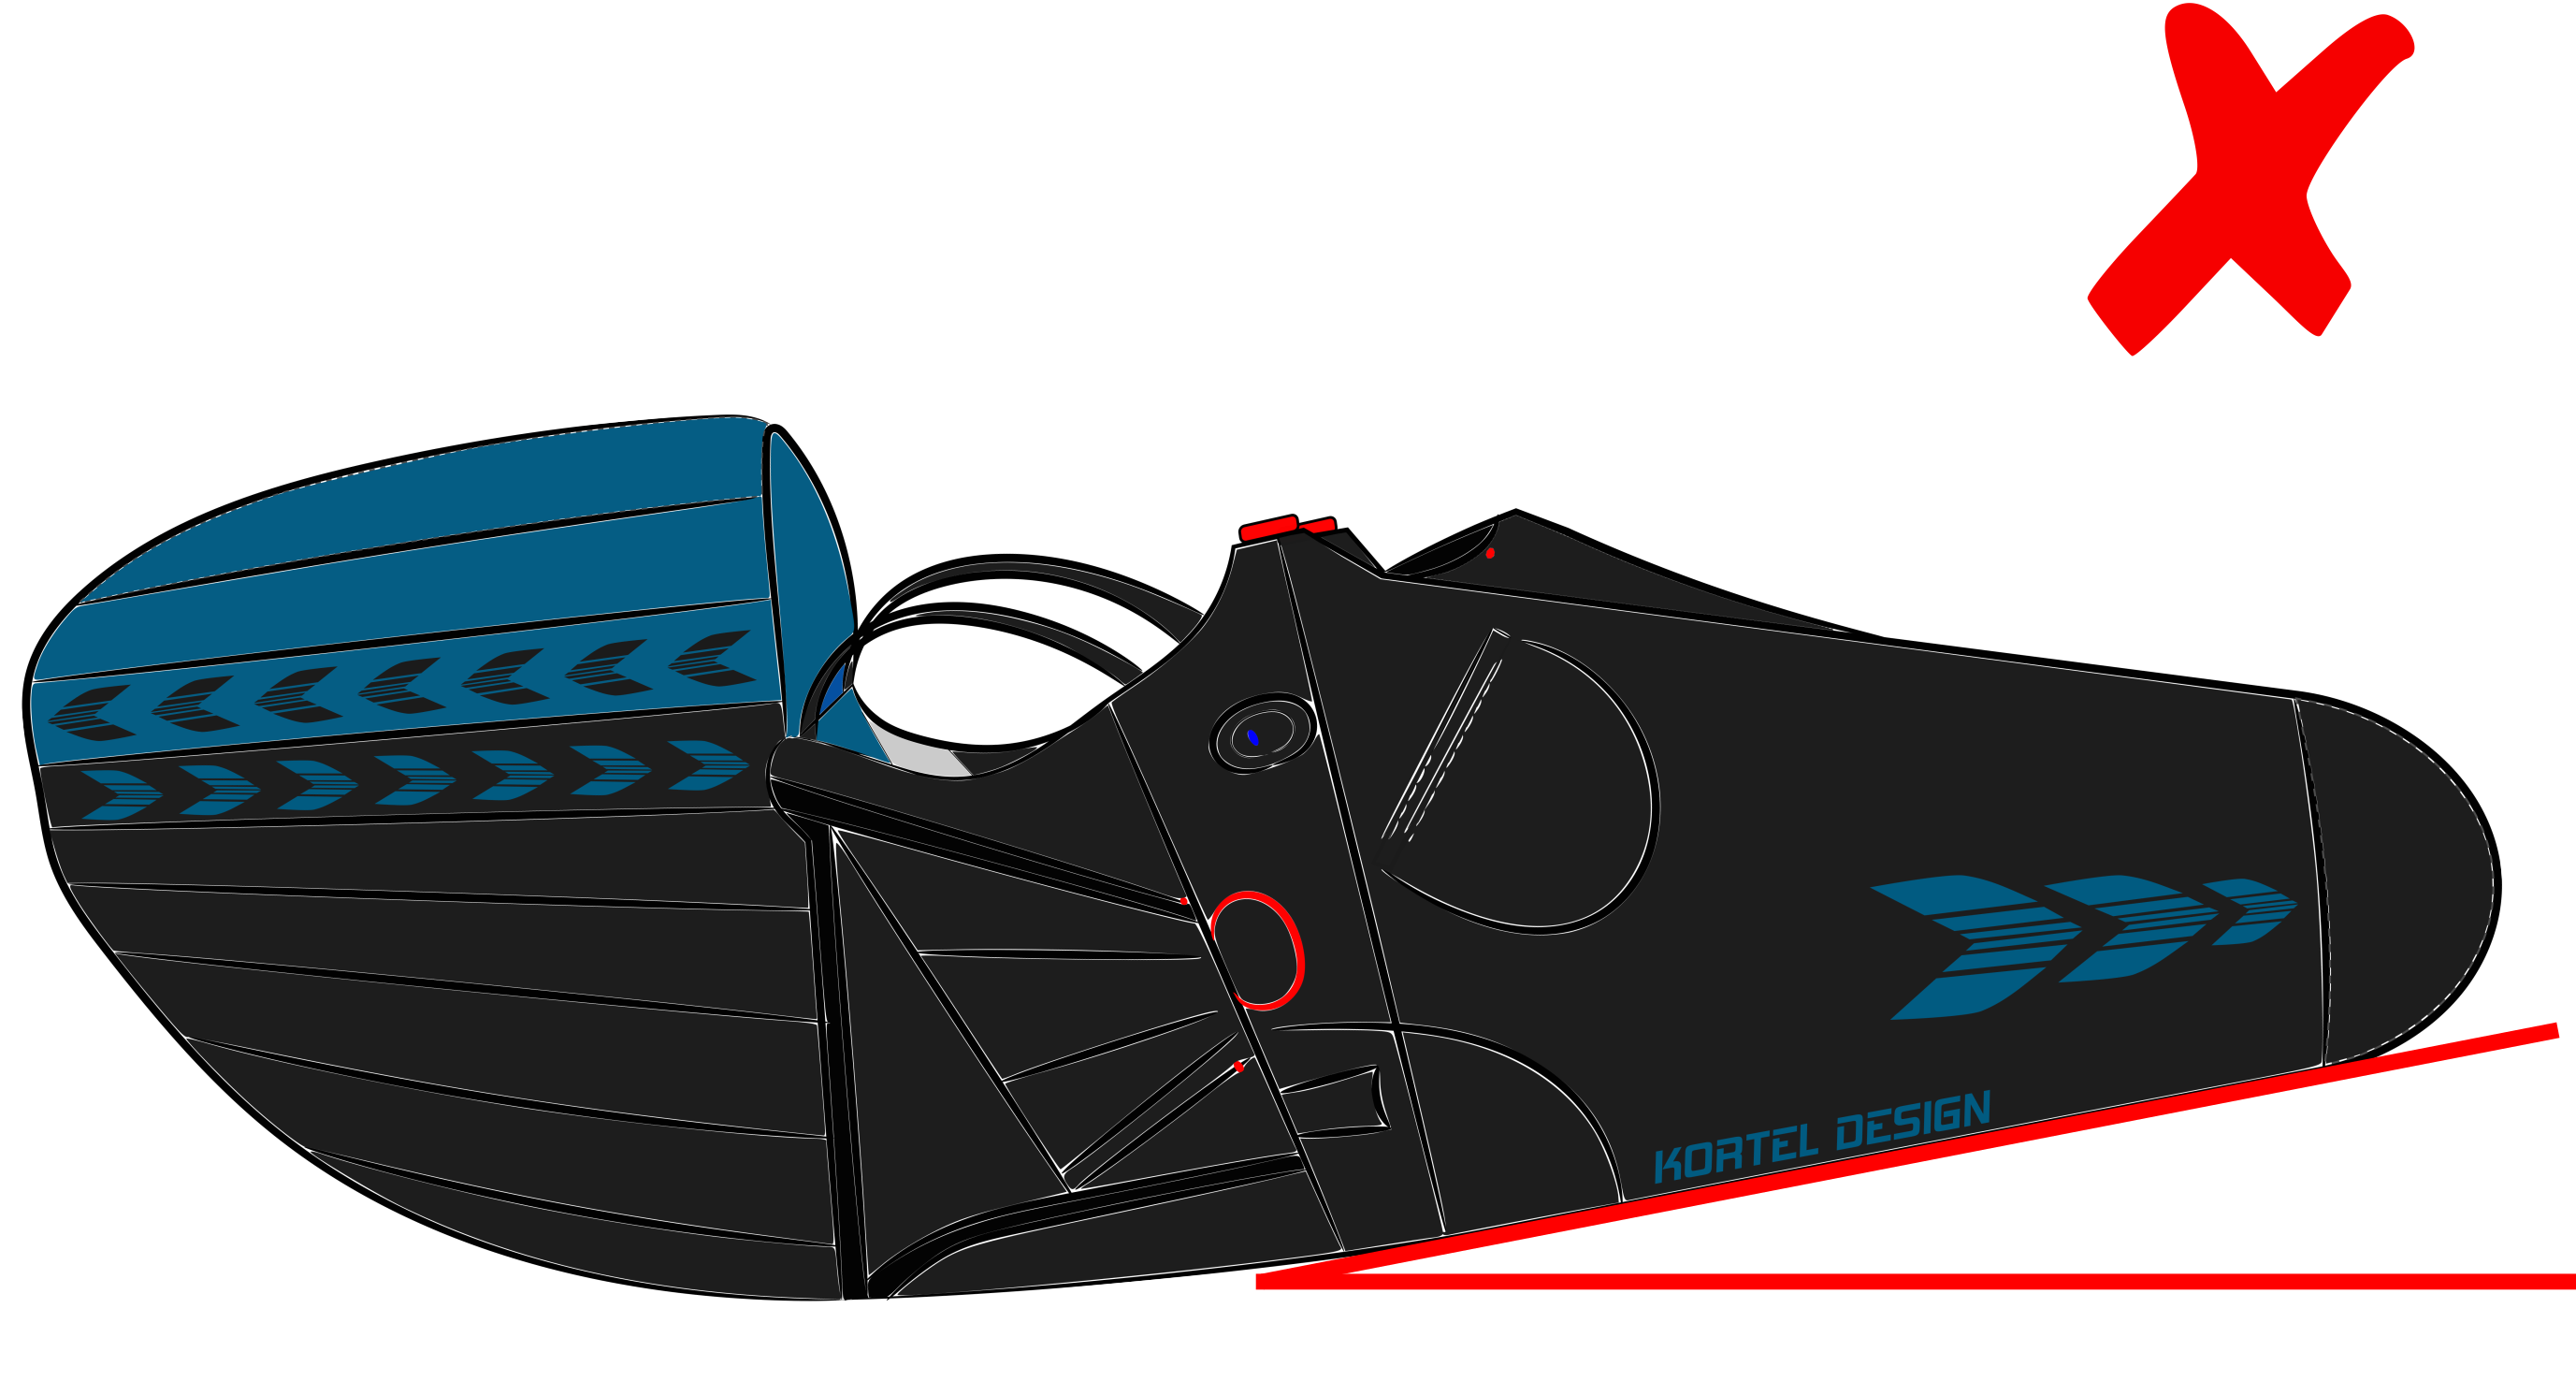
Depending on the balance of the whole system, the pilot may have to slide a little in the harness to find the optimum balance: the cocoon must then make a positive angle of between 0° and 10° with the horizontal. A negative angle, and it is a degradation of aerodynamic performance. If the angle is too large, the pilot's field of vision will be obstructed by his legs and the cocoon!
That's it!
With these tips, you should be able to adjust your harness to the best of your ability.
