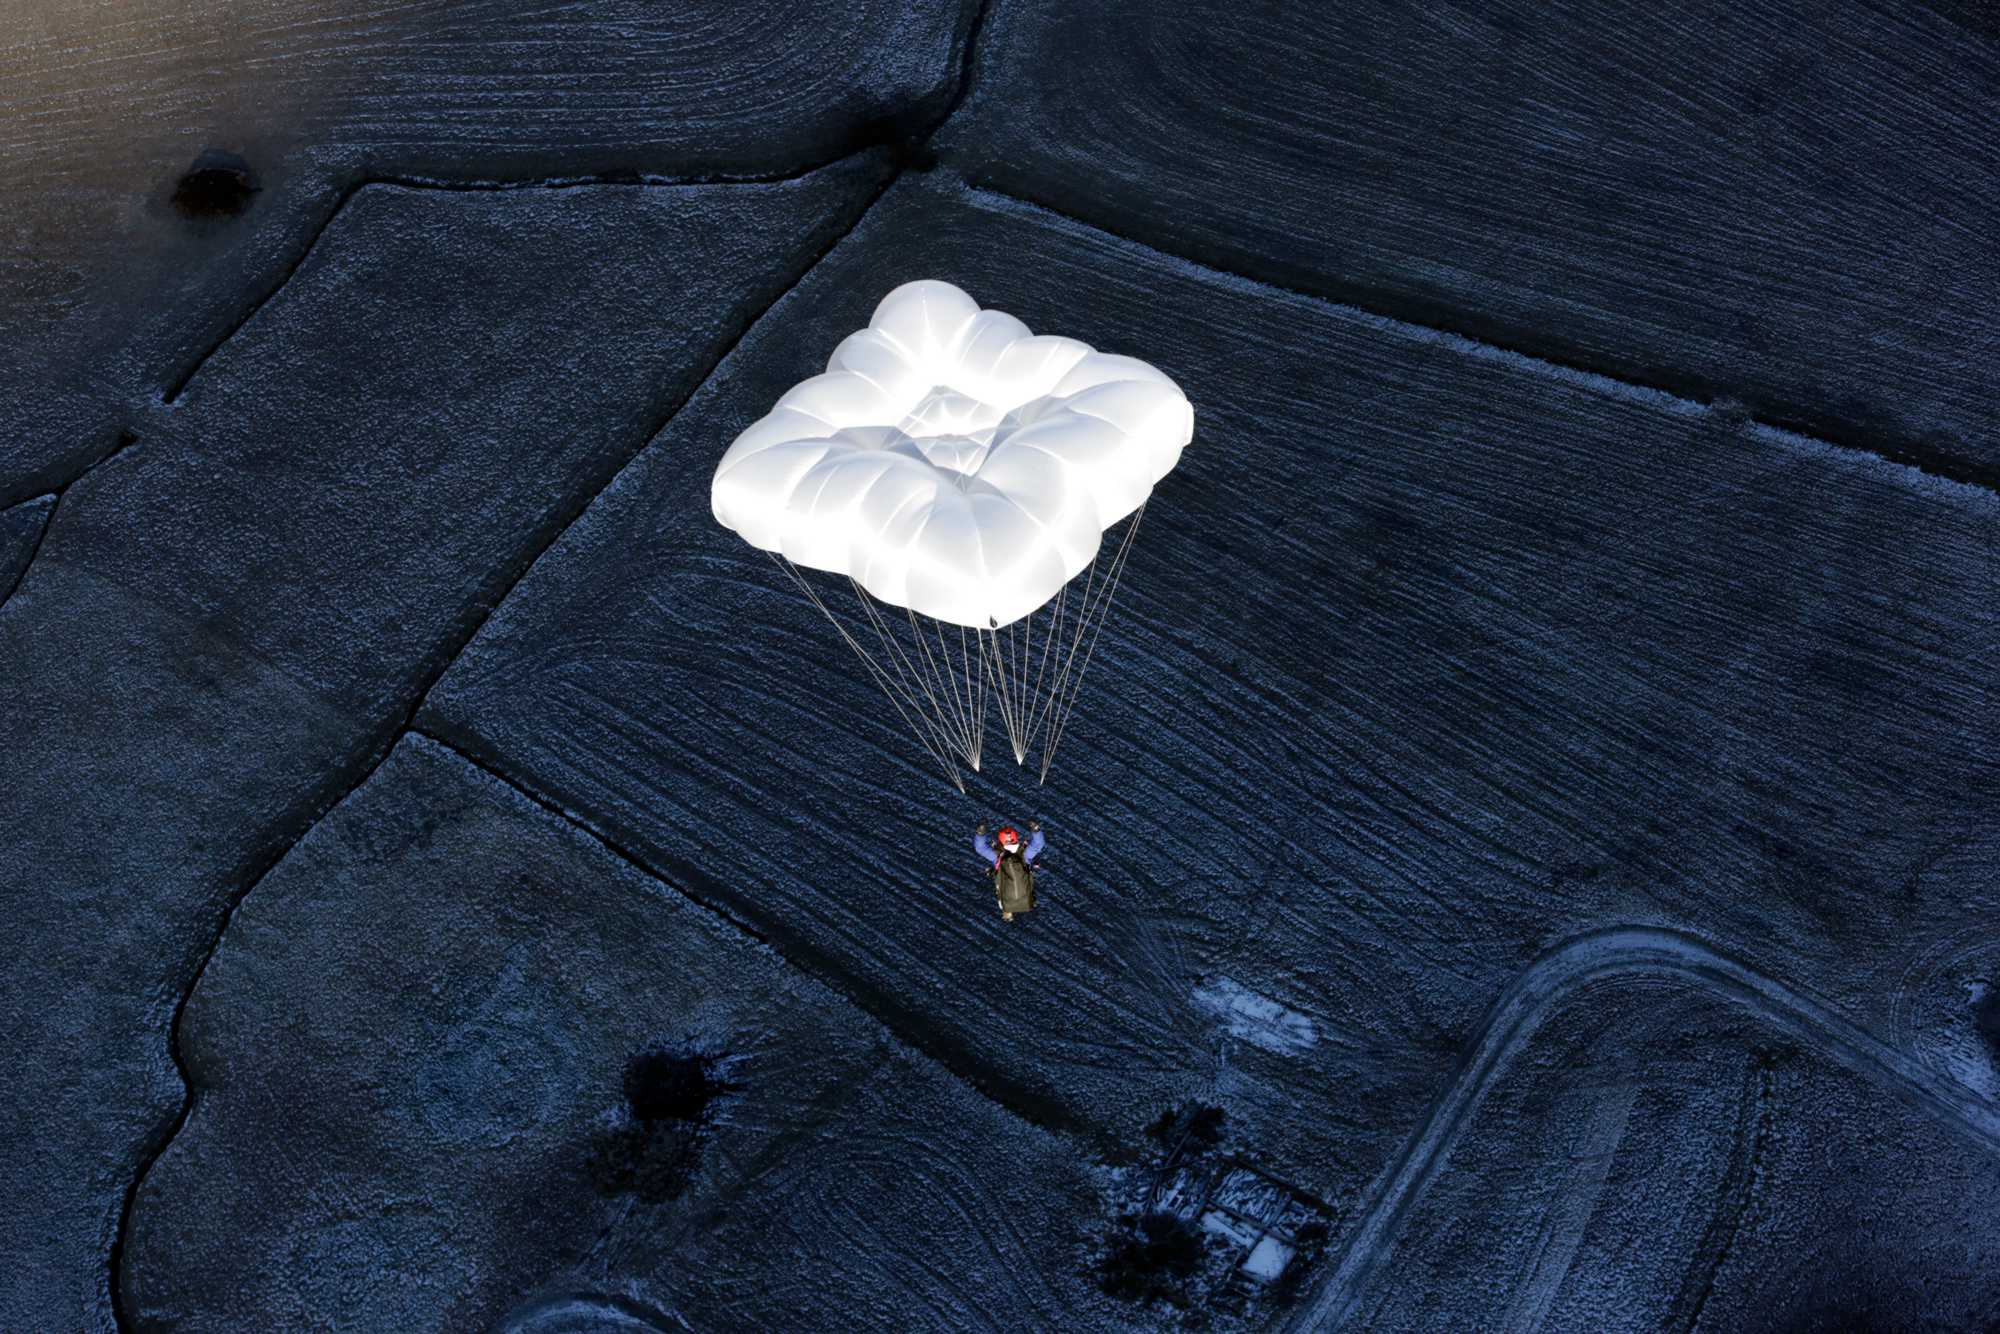
Thoughts on ... the packaging of the reserve parachute
When you have to use your reserve parachute, you need it to be as effective as possible as quickly as possible!
But the reserve itself is only one link in a chain that must be implemented to achieve the final result: it is called the deployment chain. Here we will try to describe all the elements of this chain, their function and their mutual interactions, in order to understand a little better the global functioning. Each of the elements we are going to talk about can exist in different models. Even though they might perfectly function individually, they may turn out to be the "weak link" in the deployment chain and cause the system to malfunction. It is therefore essential to check the compatibility of each element with the other links in the chain.
Let's speak the same language:
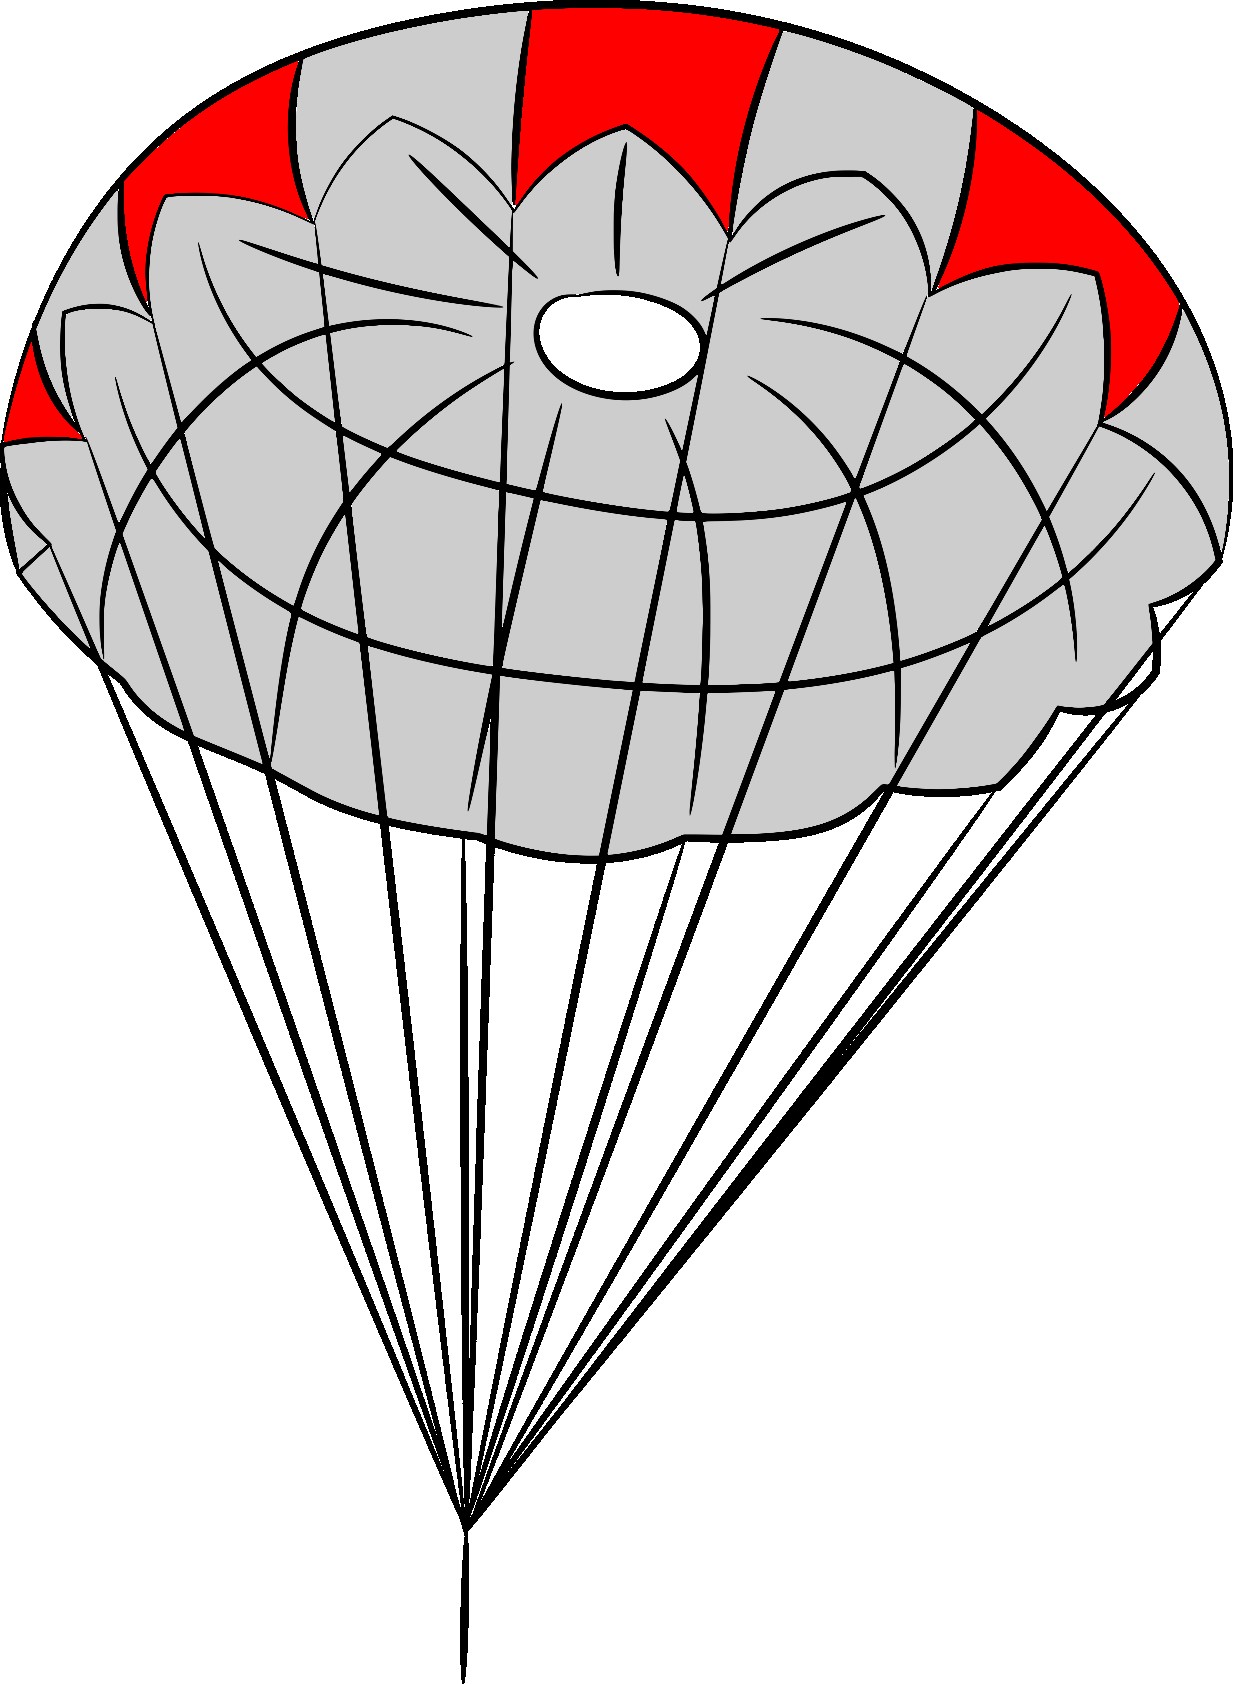
- Reserve parachute : A device consisting of a canopy and lines, intended to slow the pilot's fall so that he arrives with a sufficiently low speed to the ground. The physical principle used by this type of parachute is the aerodynamic drag that is created by the movement of the parachute through the air.
- Lines : A system of lines that allows the reserve parachute to be shaped and gives it its characteristics. The lines are an integral part of the parachute.
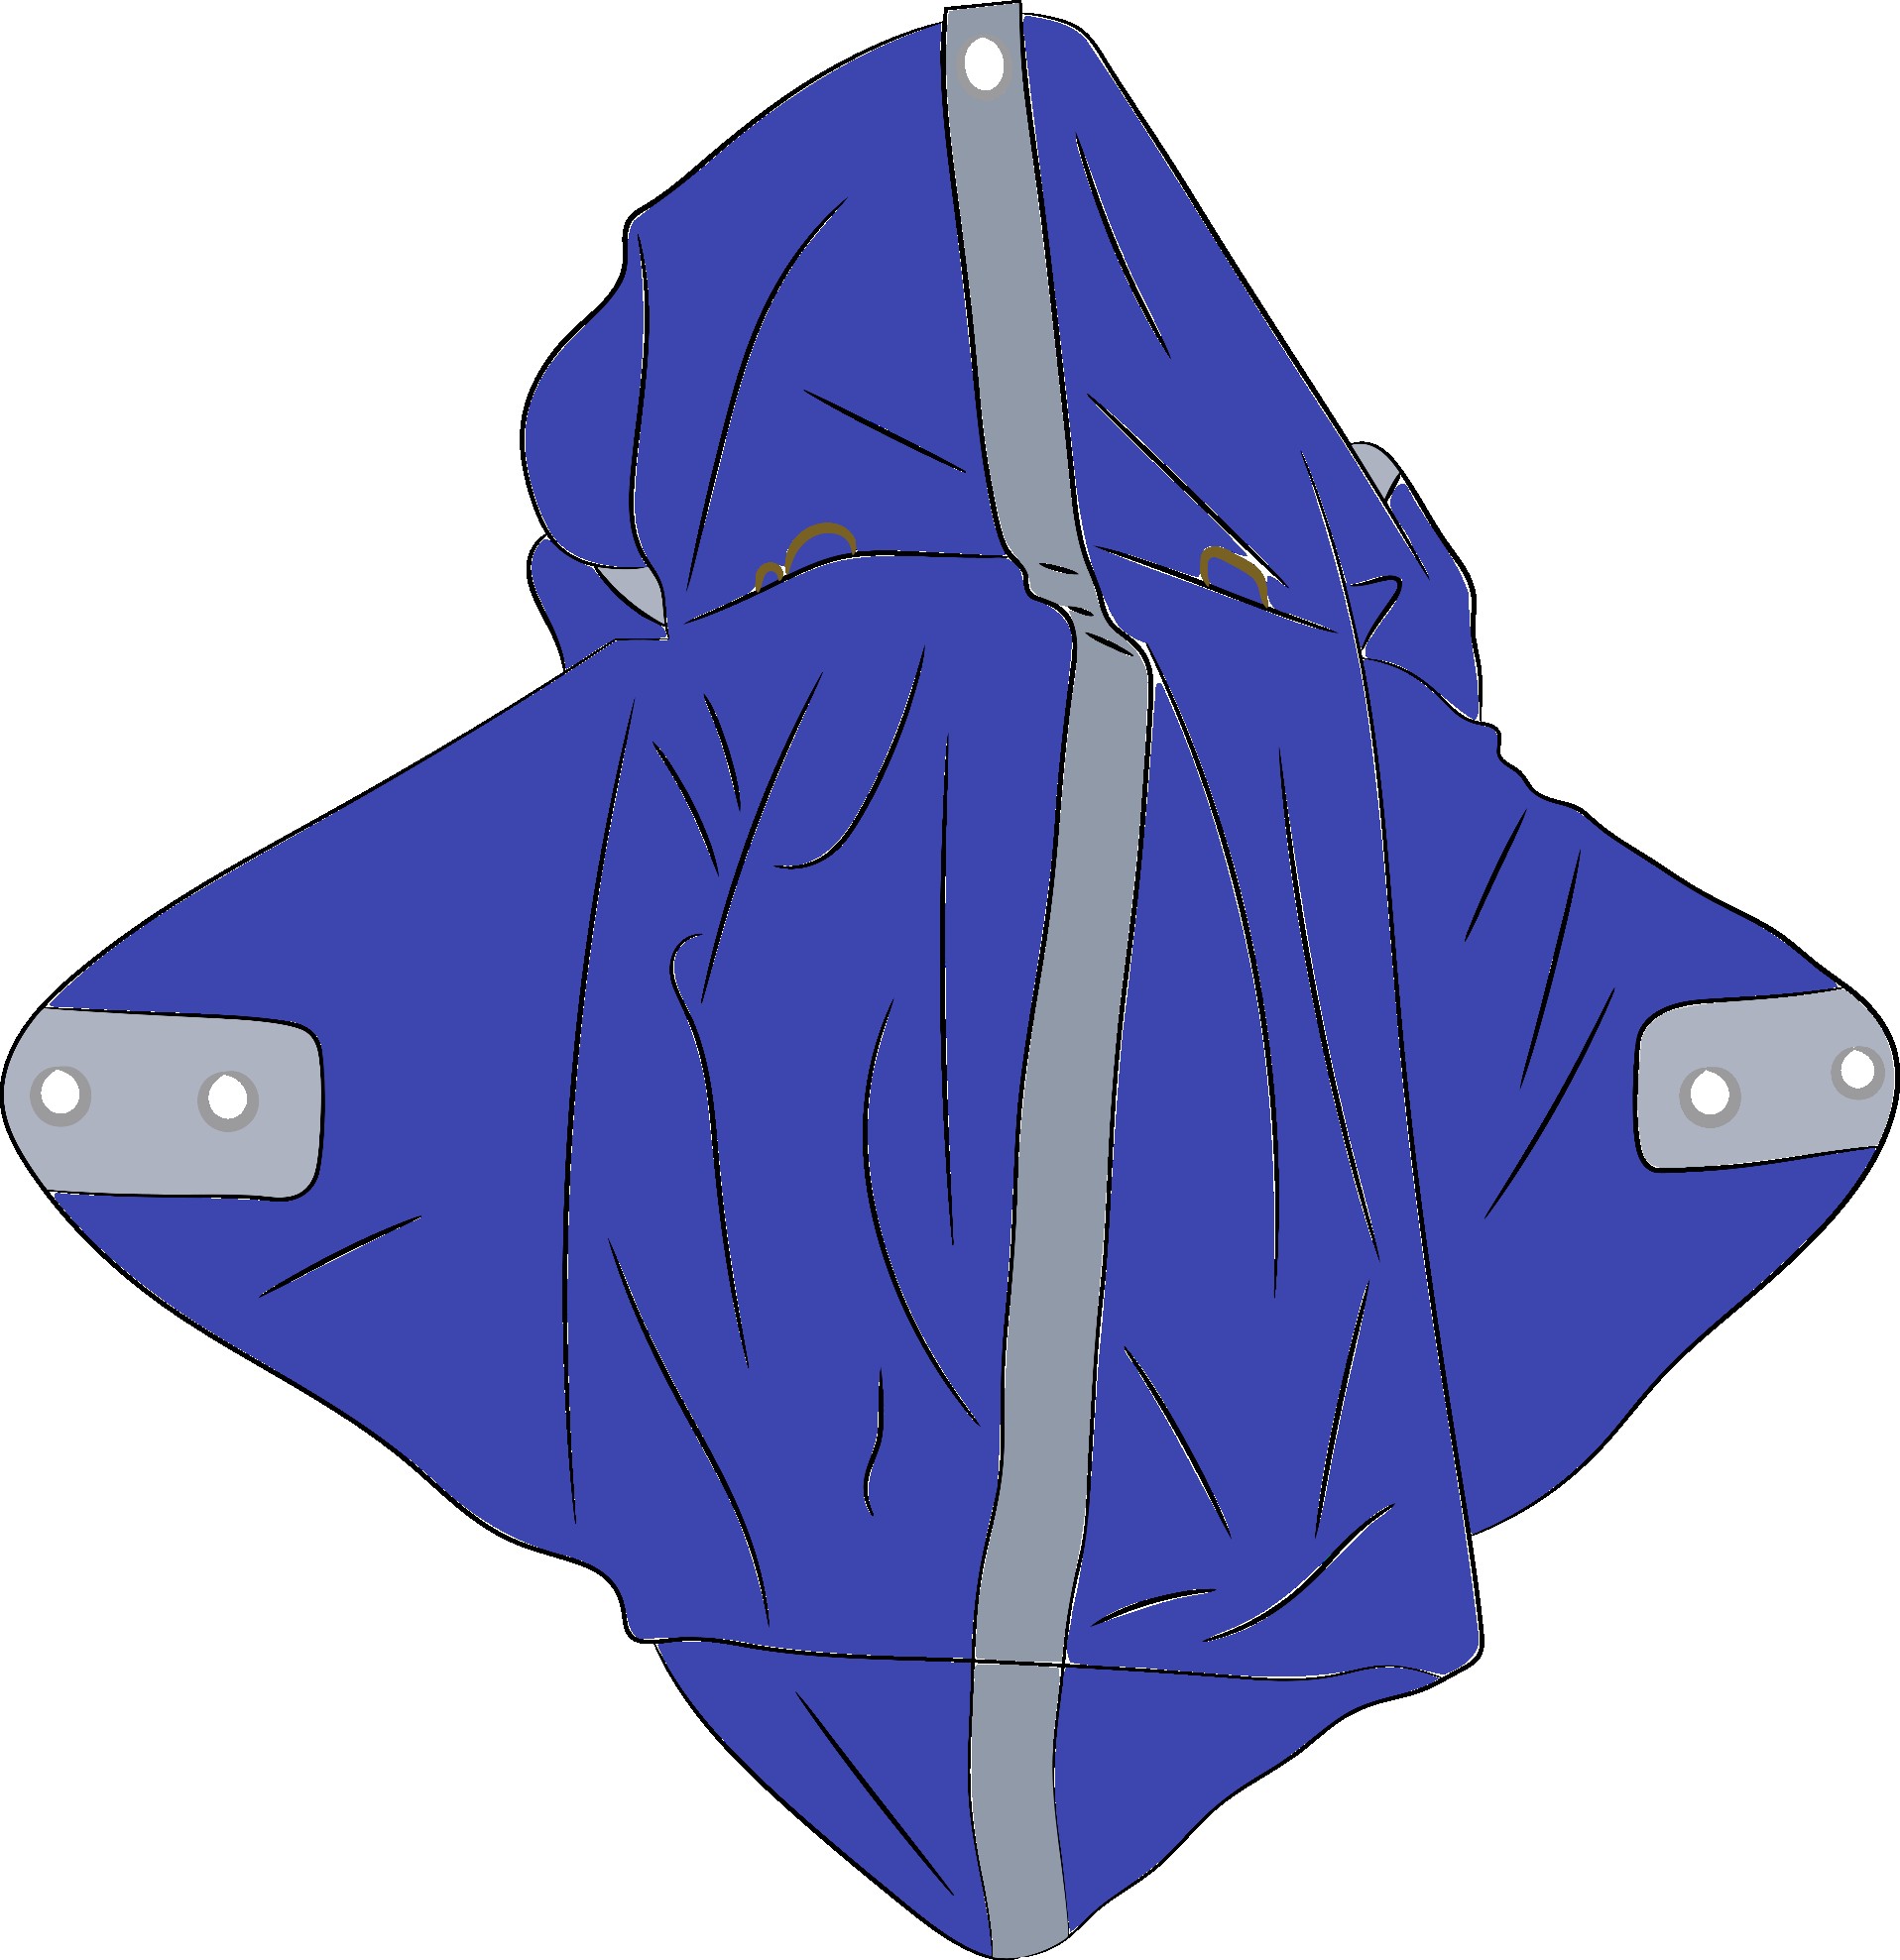
- Pod: A fabric envelope that keeps the parachute folded, and allows it to be released when the deployment chain is activated.
- Emergency handle: Ergonomic handle, to ensure the the container remains closed and to launch the pod.

- Connectors : Textile or metallic, they ensure the link between two elements composing the emergency device.


- Container : Compartment integrated or not in the harness, to receive the reserve parachute conditioned in its pod. It is held closed by the rescue handle.
- Rescue risers: Textile straps, to connect the reserve parachute to the harness. The risers can be an integral part of the reserve parachute, or they can be removable.
- Flaps : Panels composing the container, and allowing its opening and closing.
- Reserve system : All the elements related to the reserve parachute that interact with each other and that must ensure the correct functioning of the whole.
- Deployment Chain: All of the successive steps involved in the deployment of the reserve parachute, from grabbing the handle to throwing the pod.


There are 2 main phases: FOLDING / ASSEMBLY
We will try to decipher the different phases of packing, and we will see each time the items to pay attention to.
FOLDING
Folding method
At first glance, folding may seem like the most complex element to assimilate, but in the end it will probably be the easiest! All you have to do is follow the manufacturer's instructions and the folding steps described in the manual provided. If you don't feel like doing it yourself, don't hesitate to entrust a professional workshop that can do it for you for a fee. Sometimes you need to put your mind at rest!
Why is it so important to follow the packing instructions given by the manufacturer?
In fact, it has to do with the certification and the resulting structural strength test: the parachute (weighted to the maximum corresponding weight) is released into the air. When it reaches 40m/s, a system will trigger the opening and allow the deployment of the canopy in a given time (x seconds) without exceeding 11G. To pass the test, the parachute must not show any structural damage, nor any tear / break / ... whether on the fabric, the lines, or the seams. The design of the parachutes must therefore allow them to open quickly enough, but also to resist the efforts linked to the opening. With the constant search for lighter materials, designers are forced to rack their brains and find tricks to reduce the forces generated on the structure during opening. Folding methods with retarders, recommended by manufacturers, allow a more gradual opening and thus better damping of the forces. The "retarders" allow the rescue to open more progressively by better absorbing the efforts during the opening. These retarders, in some cases, are also recommended to ensure better stability during the opening and once the parachute is deployed. Even if we are aware that the tests are quite severe with the material and that they offer us a significant safety margin, it is preferable not to play the sorcerer's apprentice with the packing of our rescue parachutes.
Critical points to watch out for :
- Check the general condition of the fabric and lines: tears, traces of wear, moisture / mold, ...
- Strictly respect the manufacturer's recommendations available in the folding manual.
- Be careful not to forget any packing accessory: cord, clip, weight, link, ...
- Only pack a rescue parachute if it is perfectly dry and free of all traces of moisture.
Pod
The pod is a simple fabric envelope, to keep the parachute in its folded format and ready to be deployed. It also receives the rescue handle adapted to the container, which will be used for the extraction and the launch. Despite its apparent simplicity of design, it is adapted in shape and size to the parachute it receives, and fully participates in the deployment characteristics that have been tested for the opening. The approval is therefore valid for an inseparable couple "parachute - pod". Rigorously, a parachute which is not used with its original pod (except in particular cases of approval by the manufacturer) loses its strict approval. It is up to the manufacturer of the parachute to specify the technical characteristics (type, volume) for a third-party rescue parachute, allowing it to be used in complete safety and to keep the homologation of the said parachute.
We will see later that in certain cases, the handle and the pod are part of the same unit and are inseparable.
The closing of the pod is described in the corresponding manual, and is generally done with the help of a rubber band (fixed to the pod) which surrounds a loop of the bundle of lines. In case of a pull, the elastic is released and forces the pod to open and the exit of the parachute. It must not be too "strong" to allow the opening even if the traction is not important (under the simple effect of the weight of the parachute), but not too "loose" either to avoid that simple movements in the harness do not open the pod in the container. In case of extraction, you would find yourself with the empty pod at the end of the handle!
Critical Points to Watch For:
- Make sure the pod is compatible with the rescue parachute.
- Check the condition of the pod: no signs of heavy wear or tears.
- Ensure that the pod is completely dry before inserting a rescue parachute.
- Check the condition of the closing elastics.
- Check the condition of the connection loops for the rescue handle.
NOTE:
It is recommended to check regularly the good closing of the pod, and to proceed to the aeration and the folding of the parachute at least once a year, and even better every 6 months. But the last observations revealed that from 3 months of packing, the speed of opening of the parachutes deteriorates significantly. The ideal recommendation is therefore to ventilate and repack your rescue parachute every 3 months, to keep the best opening speed characteristics.
Now that your rescue is perfectly folded in its pod, let's see what happens next!
MOUNTING
Rescue risers
The rescue risers connect the parachute to the anchor points on the harness. They can be of 2 different types, depending on the rescue used:
- Those known as "V", which allow the 2 anchor points to be connected to the single connection point of the rescue. This is the case with hemispherical parachutes and certain squares (or of various shapes) that cannot be steered. Alternatively, it is possible to use single-stranded rescue risers, which can be grouped together at the rescue connection point.
- The so-called "H-shaped" risers, which are used on steerable rescues and which are generally integrated into the structure of the canopy. Care must be taken with the left and right sides when assembling.
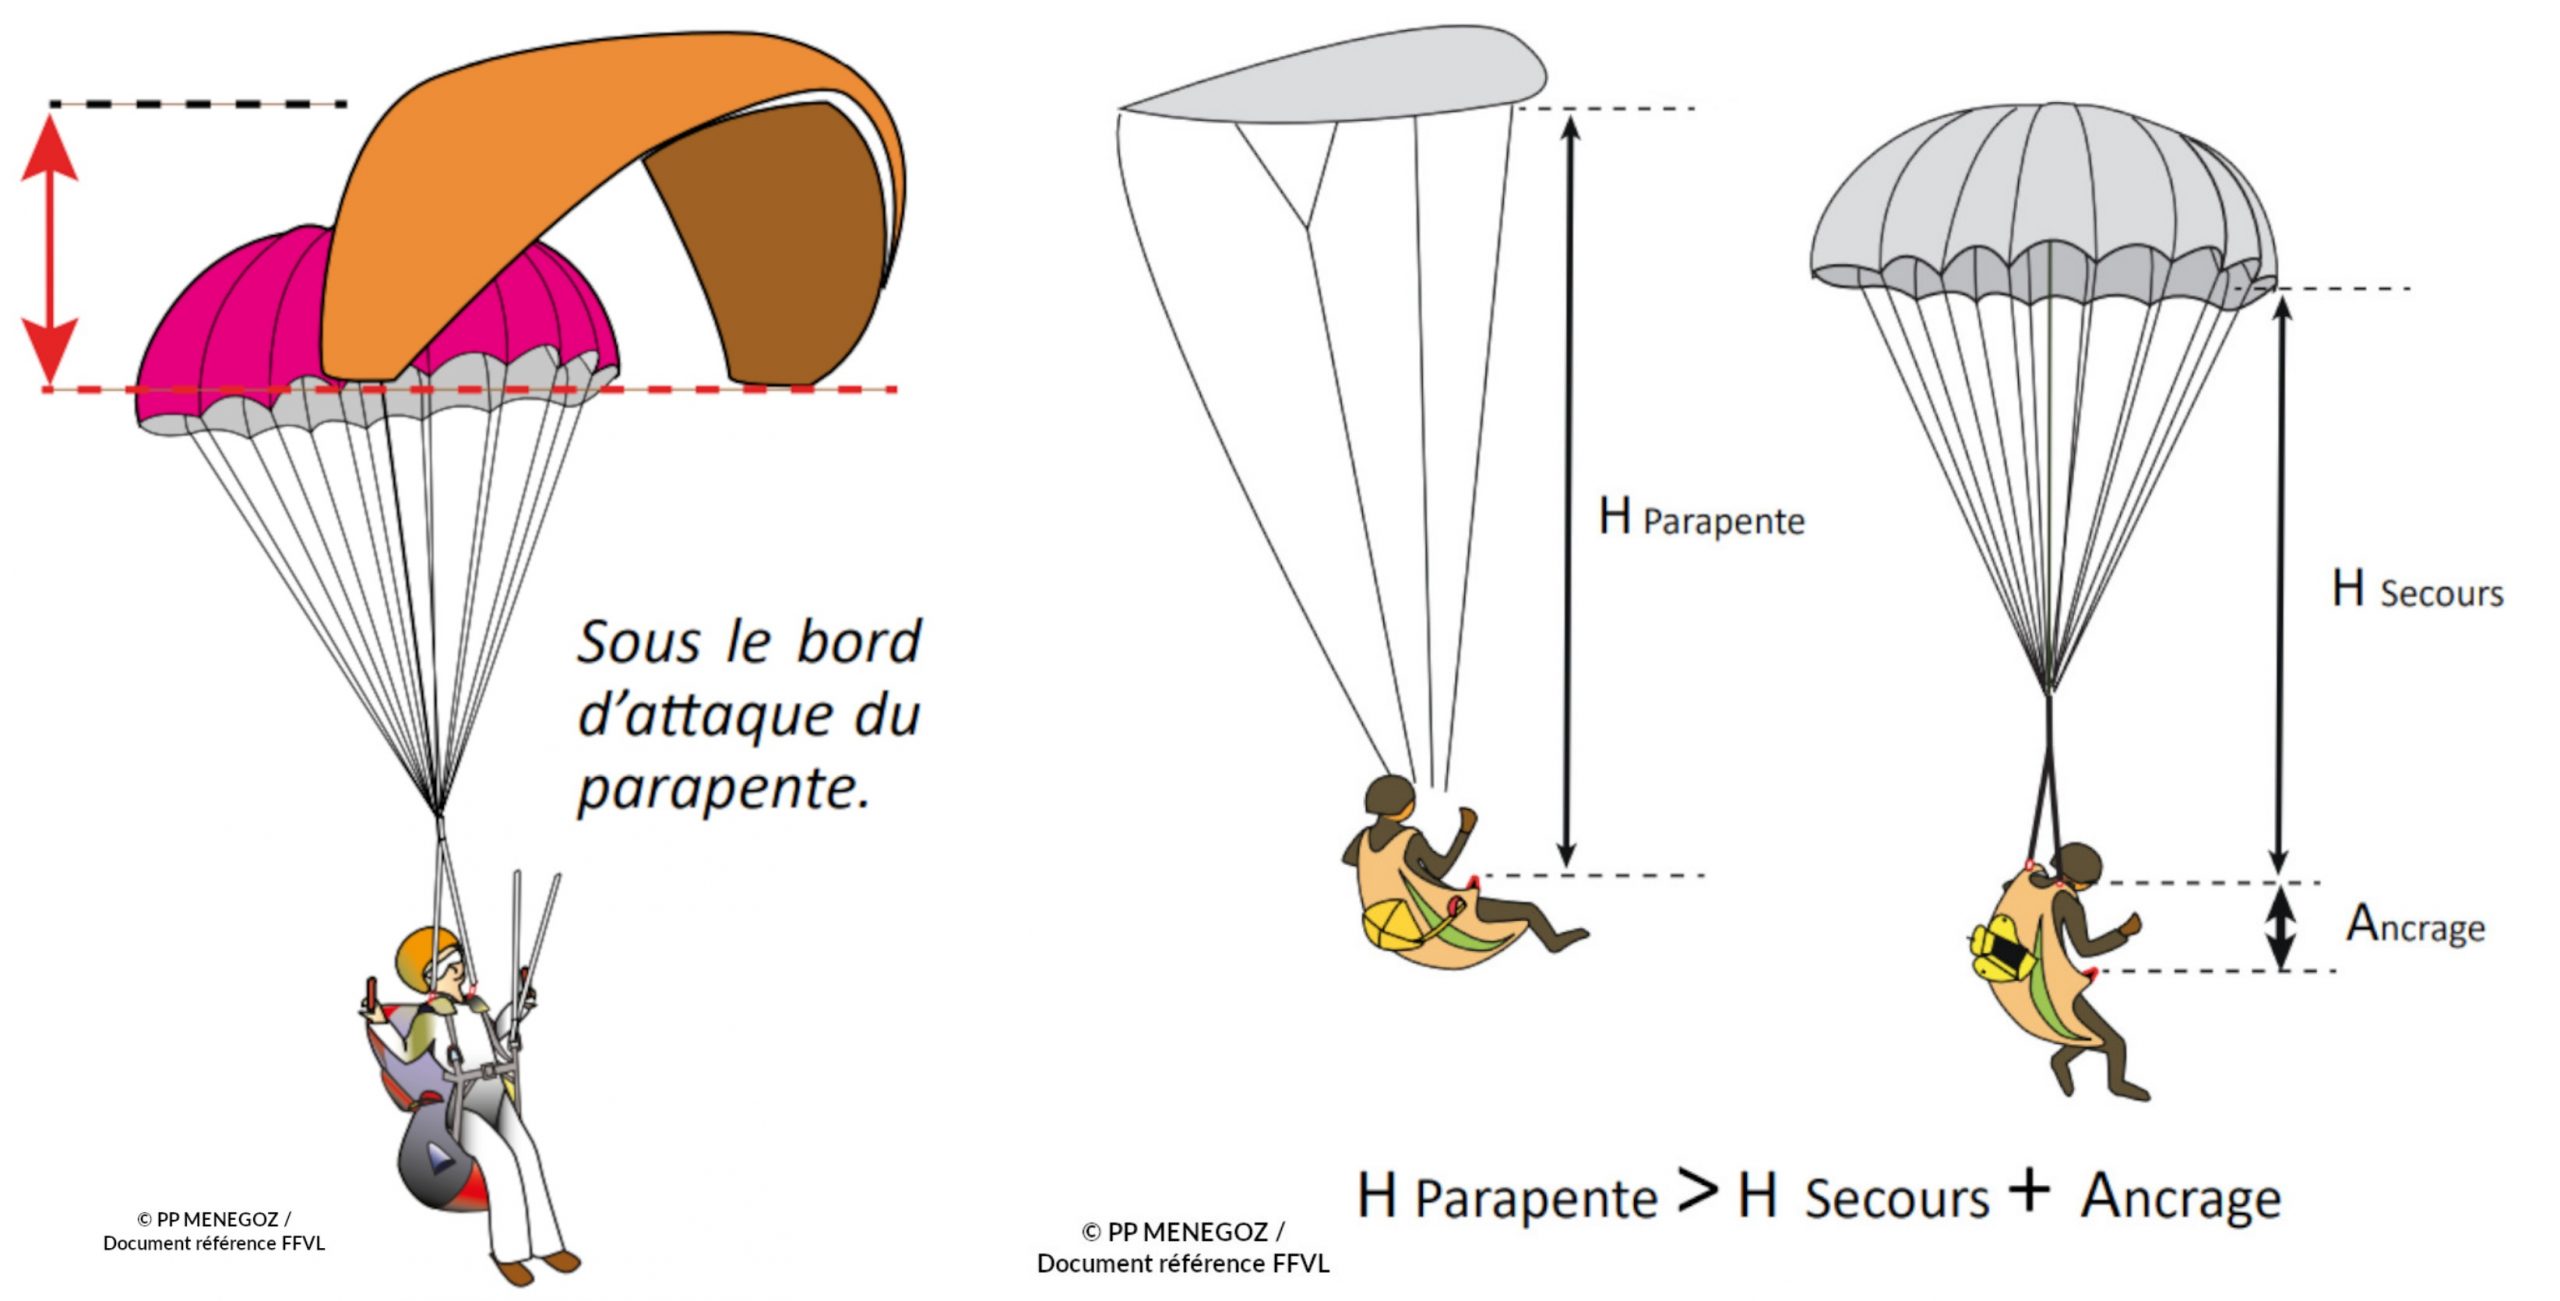
An important point to check when mounting the risers is their length. The combined length of the risers and the reserve (with its lines) must be less than the length of the paraglider's line cone. As explained in the "Considerations on Rescue Parachutes", it is important that the leading edge of the reserve is not at the same level as the center of the canopy, to avoid the rescue being hit when it opens or being depressed and having difficulty inflating properly. This obviously depends on the type of wing and the rescue (length of the respective suspension cones), but for simplicity it is recommended to use rescue risers of about 120-130 cm.
Critical points to watch for:
- Check the general condition of the risers: cleanliness, wear, abrasion, condition of the seams, connection loops.
- Check that the length of the risers is appropriate for the parachute and glider (see drawing). A length of 120-130 cm is usually appropriate.
Connectors
If the elements (harness / risers / parachute) of the rescue system are independent, you will have 2 links to make: "harness -> risers" and "risers -> parachute". The more links a chain has, the greater the risk that one of the links will fail. It is therefore necessary to limit the number of connectors to ensure these links as much as possible. Very often, it is possible to make a lark's head connection. There are still many prejudices about this connection, but if done correctly there is no safety problem. This is also how the lines of your paraglider are connected to each other, and sometimes even to the risers (light mountain gliders).

It is important to limit twisting of the straps to keep them as flat as possible, and to tighten the knot very tightly to prevent loosening. However, regular visual inspection is essential to detect any problems.
If you have to use a third-party connector, you will have to choose it according to the following points:
- Working load:
The connectors are the only elements that are not subject to any standard. There is therefore no minimum strength imposed on these devices. Moreover, the various existing standards (harness / paraglider / parachute) are not necessarily homogeneous between them on these "common" areas which thus remain a little vague... To keep it simple, and to avoid any useless risk, it is recommended to use a connector whose maximum load is greater than or equal to 24kN. Why? Simply because it is the highest value of the 3 existing standards, and is even valid for tandem. With a connector with this strength, there is no question about where it can be used! The maximum working load is marked directly on the connector where possible, or on a label sewn onto the flexible connectors.
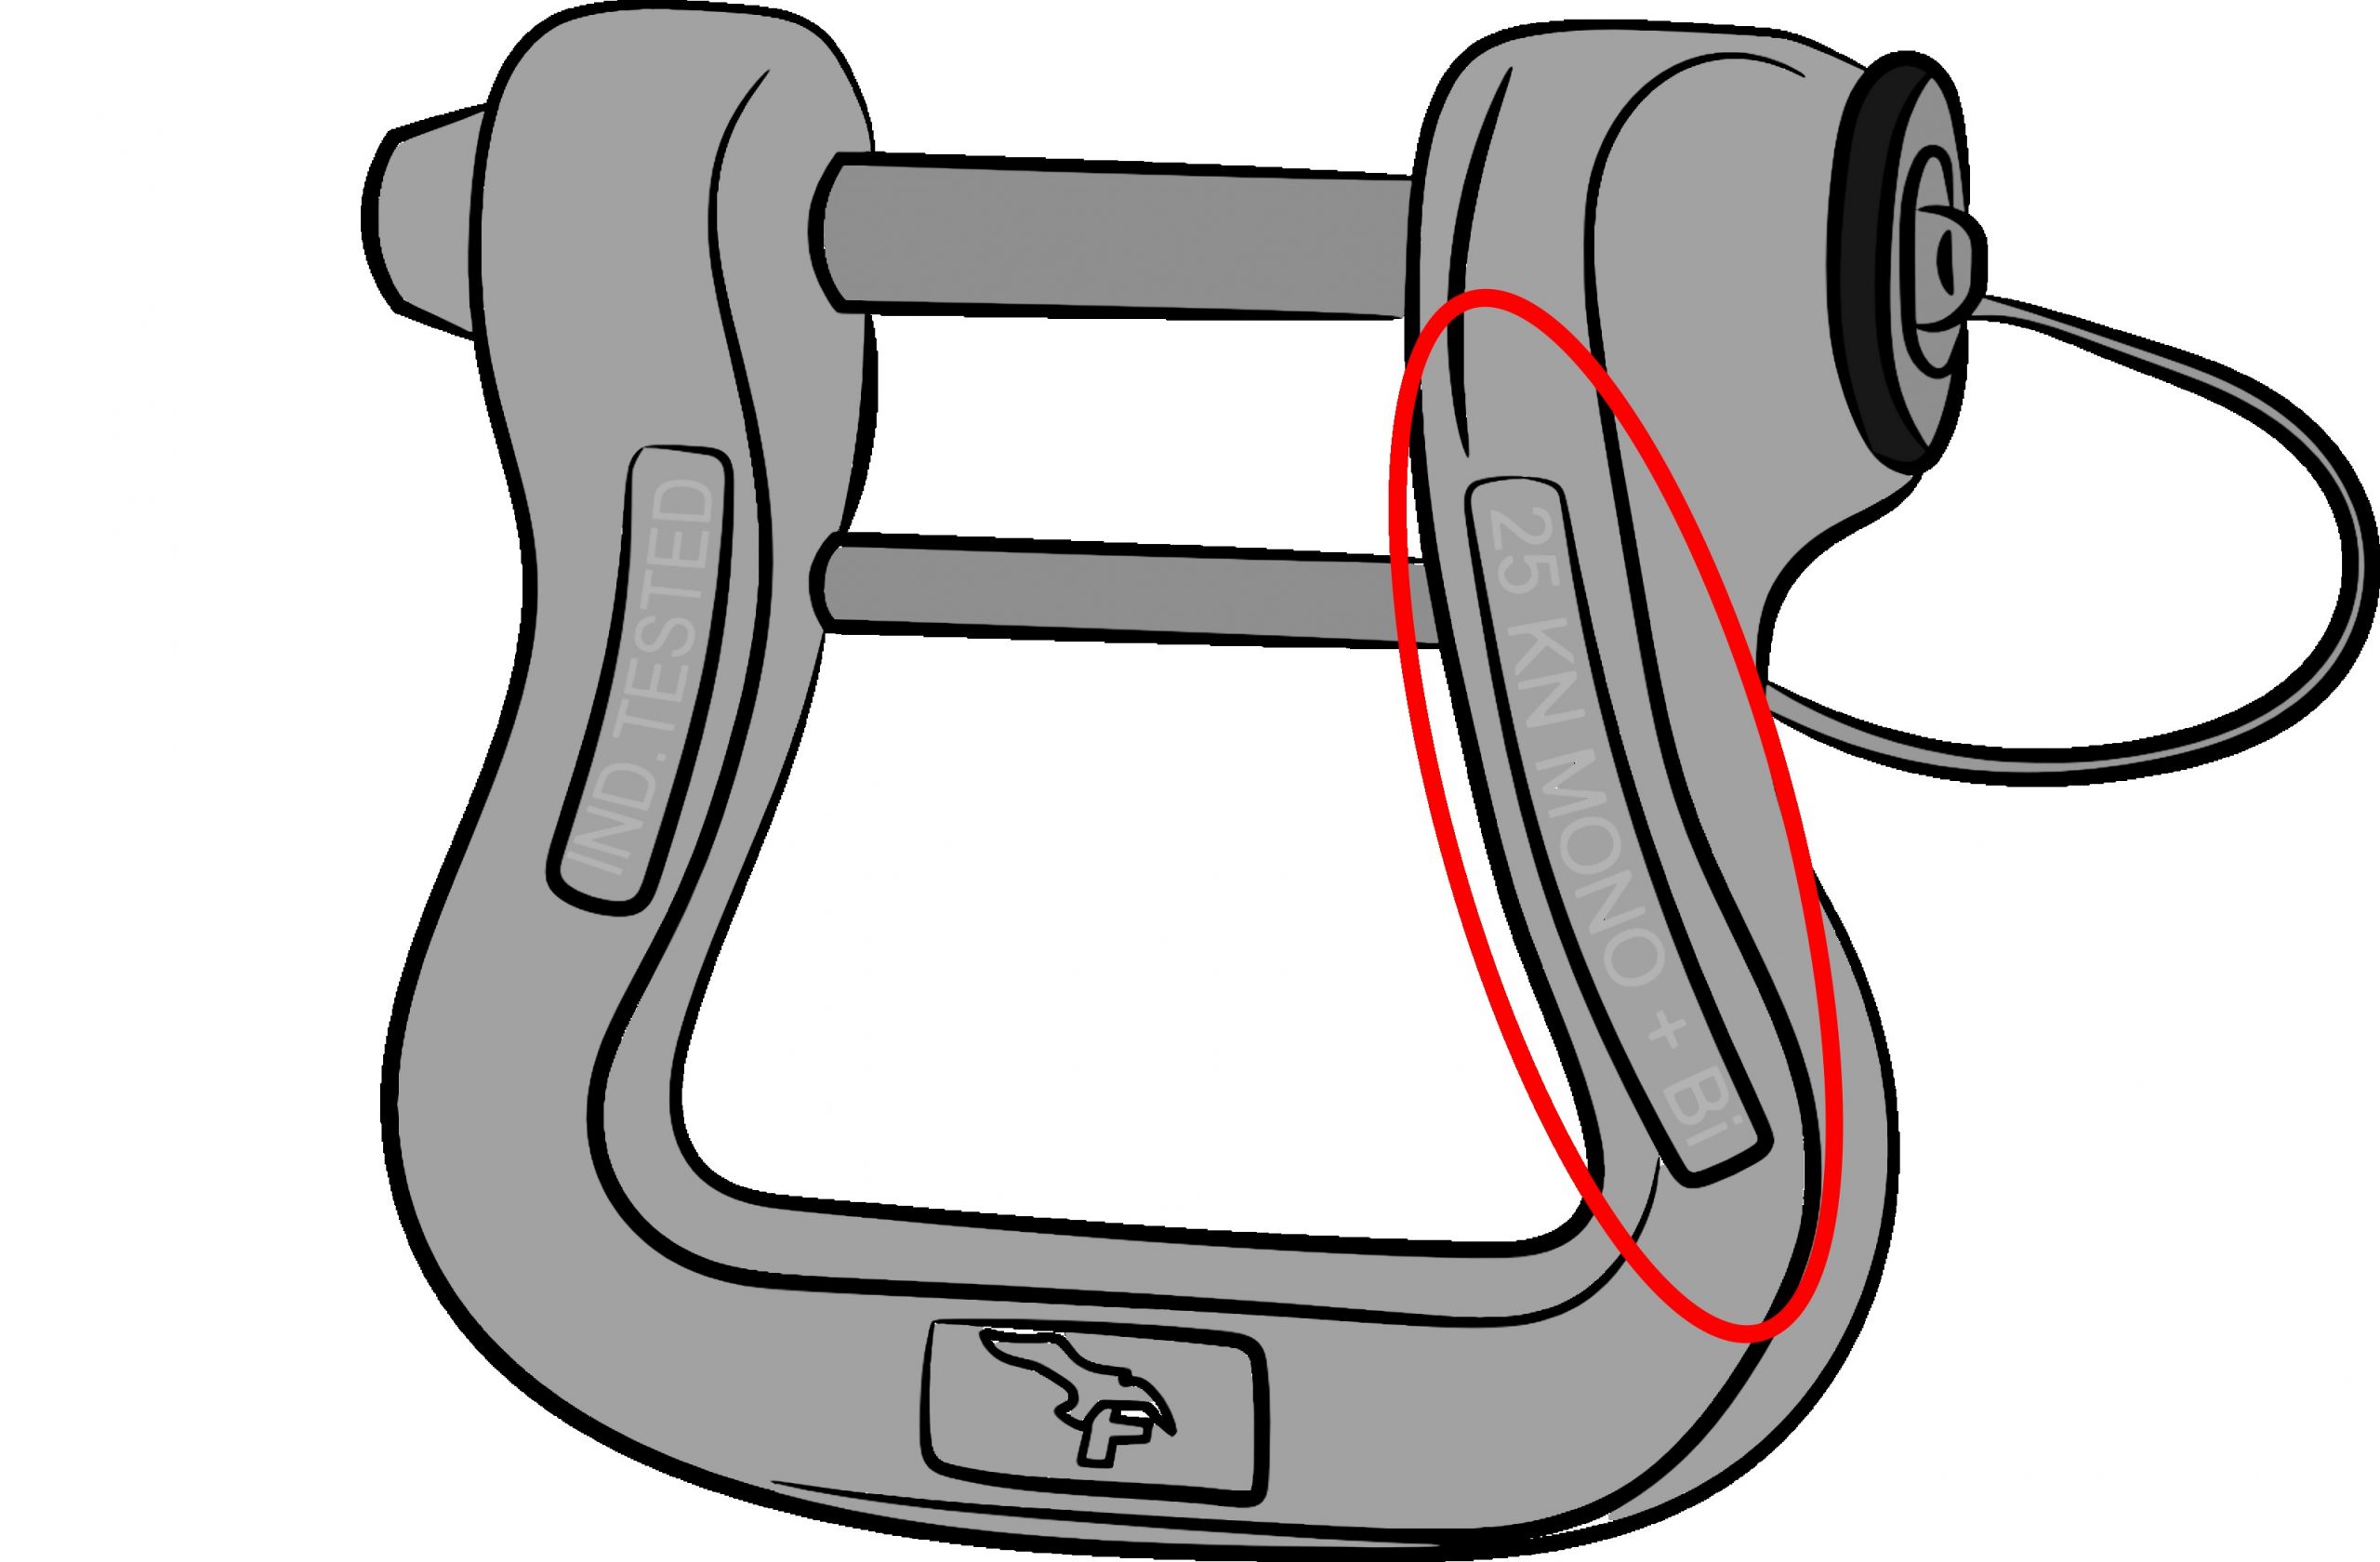
- Shape:
In order for the connector to have its maximum strength, it is essential that it can work in its main axis. It must therefore not be able to move sideways during the various manipulations, and especially during loading. The easiest way to do this is to have a connector adapted to the different elements that it will have to connect. The widths of the straps and the connector bases must be as close as possible.

It can also be useful to lock the position of the straps with an O-ring for example(Video).
- Stability / Reliability:
Each connector has its optimal characteristics when properly locked. Keep in mind that these connectors are often hidden, and that it is not always easy to verify that they are always locked correctly. It is therefore important to choose connectors whose closure can be guaranteed over time, or to find a way to guarantee it. Avoid adhesives that can leave traces of glue and solvents, which are not recommended for the life of the textile elements (straps, halyards, etc.). It is preferable to use "tightening" tricks such as a piece of inner tube for example. It is nevertheless essential to proceed to a regular visual inspection to detect any possible problem.
As always, there is no miracle solution and you will have to find the most suitable solution for your equipment.
Critical points to watch for:
- Check the advertised breaking load.
- Check the general condition of the connector:
- If metallic: wear, corrosion marks, fluid closure.
- If textile: damaged protective sheath, cut marks, burn marks.
- If lark's head connection, check that it is correctly made (strap flat, tight knot).
- If originally sewn, check the condition of the straps and seams.
- Make sure that the shape of the connector is adapted to the width of the straps concerned.
Mounting
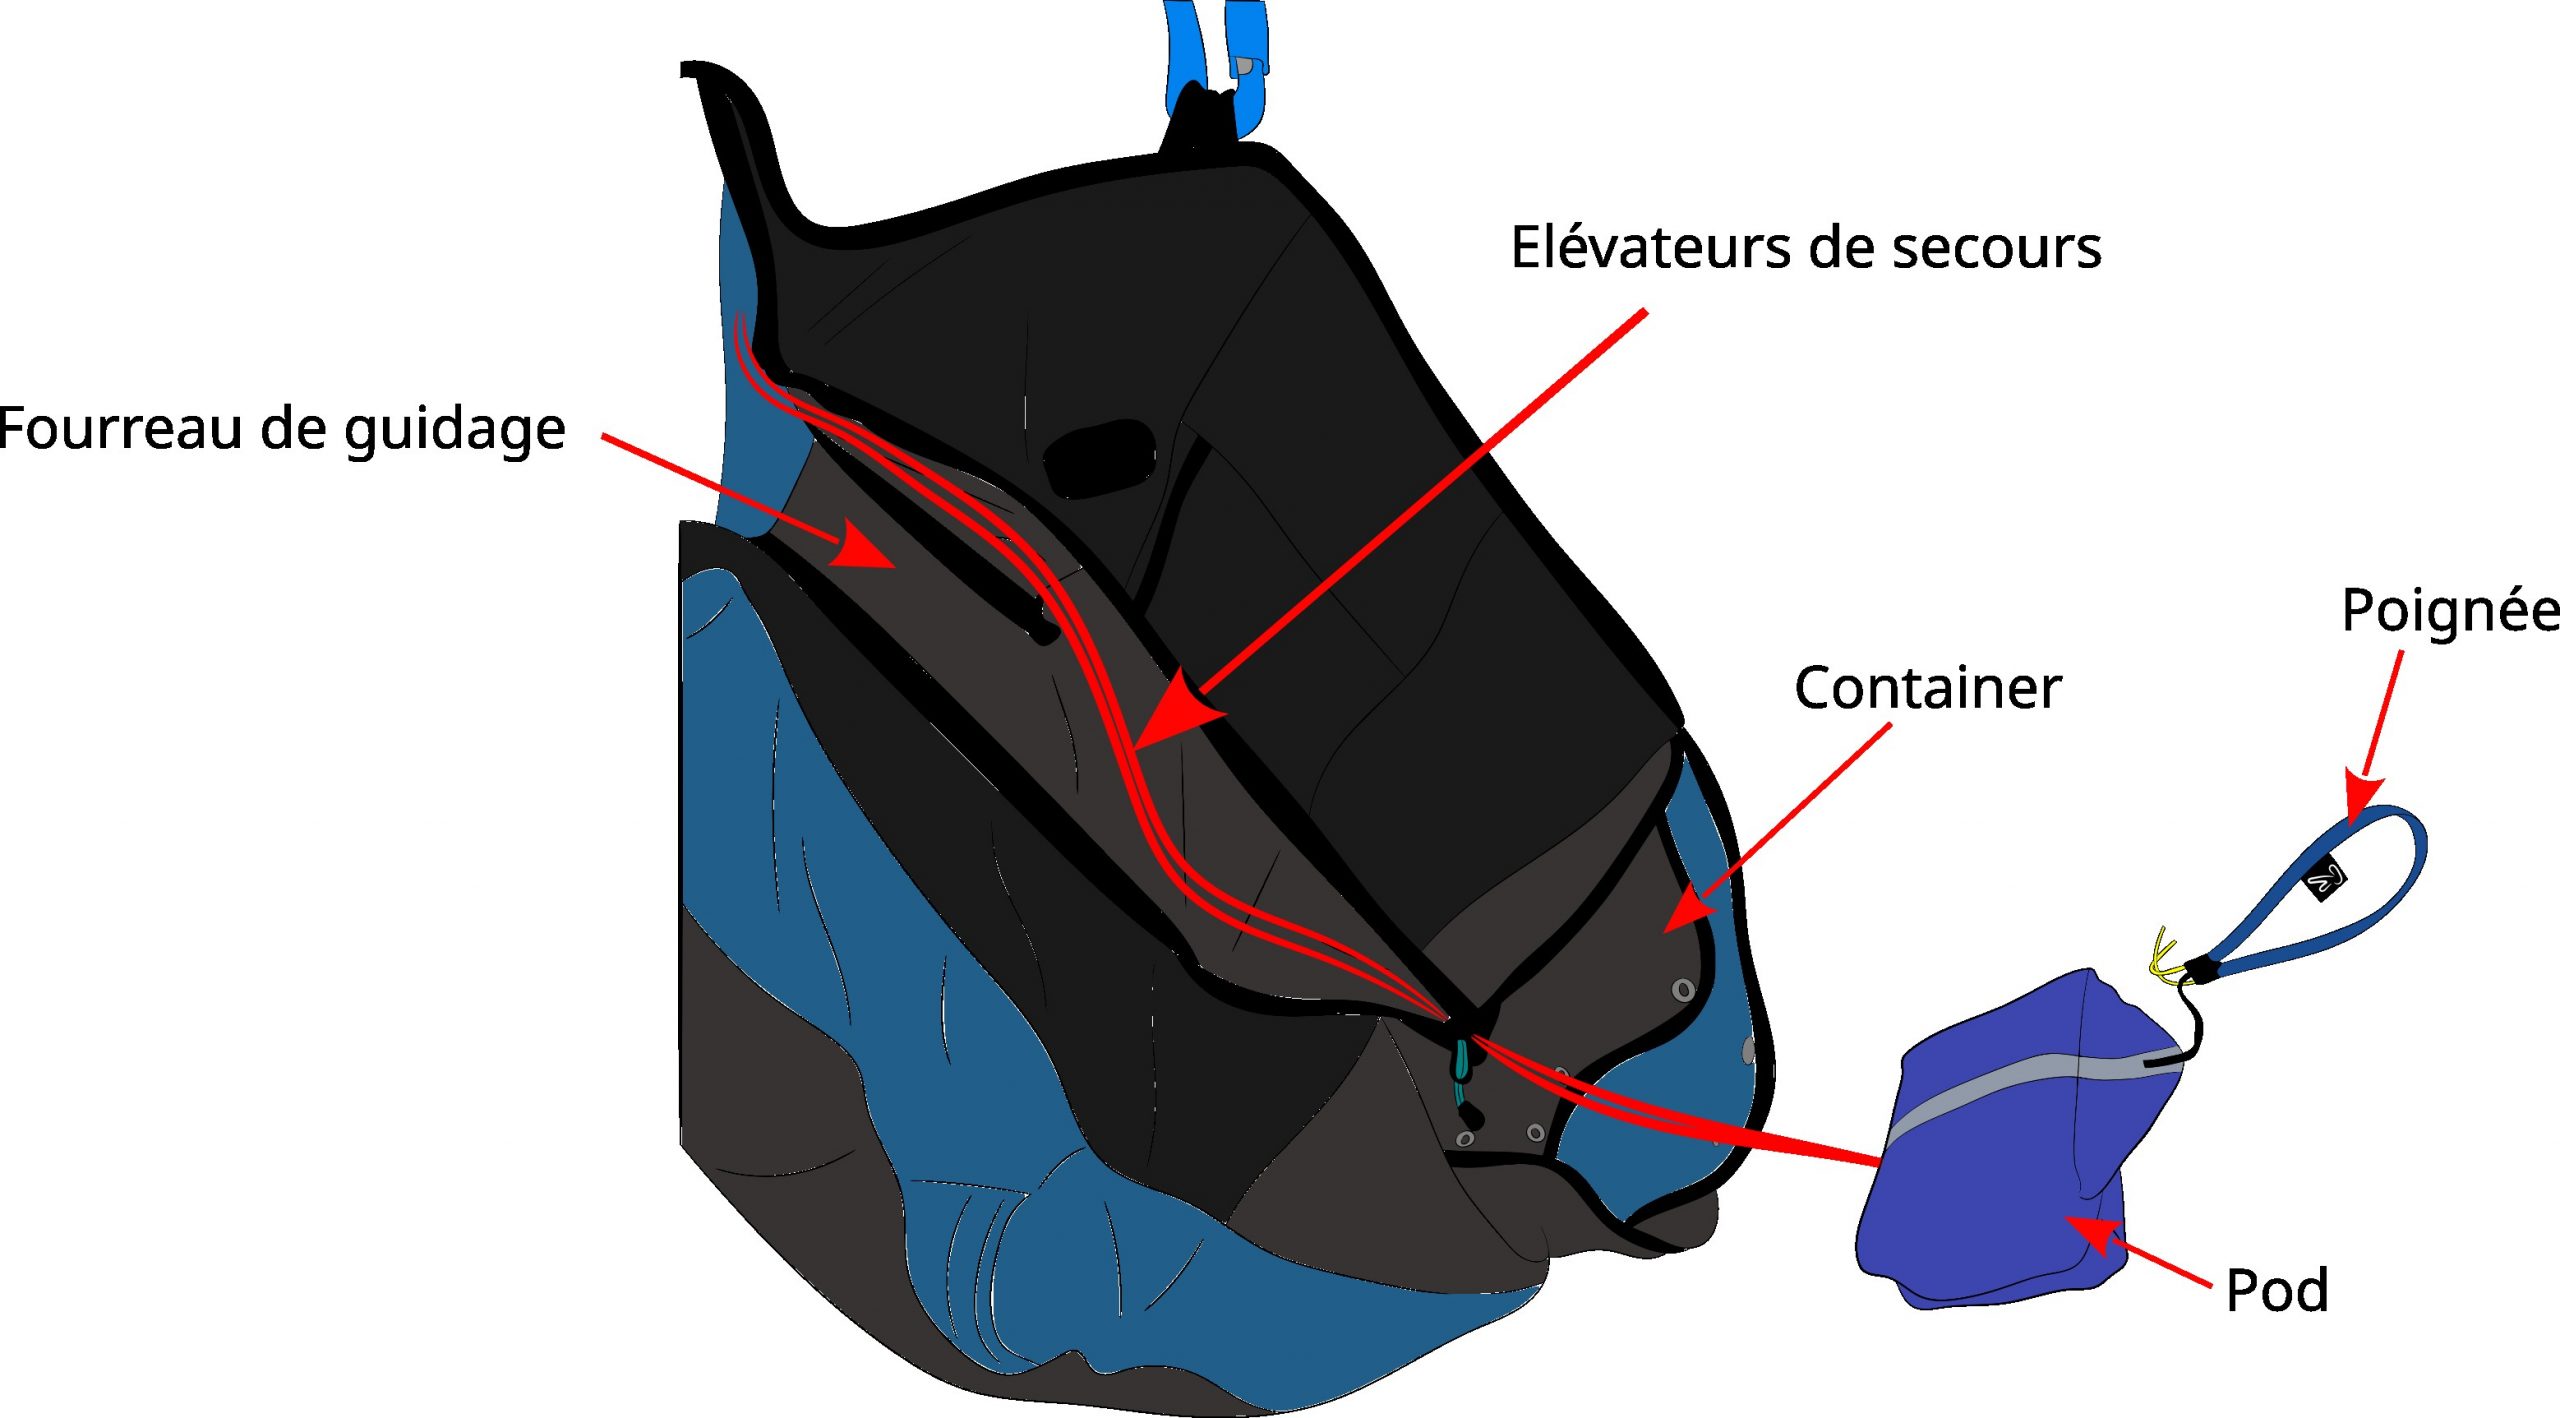
The elevators are usually installed from the container to the connection points by means of a sleeve. This sleeve isolates the rescue elevators from external aggressions and avoids any risk of entanglement with other elements outside the rescue system. The closure is usually made with Velcro or a zip, which will allow a quick opening and a clean release of the rescue elevators. It is important to regularly check that nothing could hinder the proper functioning of the liner and in particular its total opening so that the risers can play their role perfectly. In the case of a front container with a sleeve connected to the harness, it is important to position the sleeve outside the speed bar during assembly, so that it does not interfere with the exit of the rescue risers.
Critical points to watch for:
- Check the condition of the velcro, zipper, or closure system in general.
- Make sure that the opening of the sleeve is smooth and free of blockages.
- Check that the sleeve opens fully, so that the elevators are released correctly.
Container
The container is the part that will hold the pod and part of the lines (see packing manual). It can be integrated into the harness, or completely independent and then connected to the harness (frontal container). The rescue risers are guided inside from their attachment points thanks to the guide provided. Its role is to keep the pod and the lines in the best position in case of extraction. It must be adapted in shape and volume to the parachute on board, or be adjustable to adapt to it. A parachute that is too small for the container can cause the lines to become tangled and even open the pod! A parachute that is too big for the container may cause difficulties during extraction. It is usually composed of one or more flaps locked by the rescue handle, which will create an opening wide enough for the passage of the parachute and the pod during extraction. No design element of the container should risk hindering or slowing down the exit of the pod.
To overcome these compatibility problems, harness manufacturers now offer "pod and handle" assemblies that are perfectly adapted to the internal container of the harness.
In this case, it is necessary to take the parachute out of its original pod (tested and validated at the homologation) to pack it in the specific pod of the harness. This operation is not so simple, because it requires to partially unfold the parachute and to give it the adequate shape for the new pod. It is important to make sure that the original packing recommendations are followed as much as possible, as these are the ones that have been tested and validated and that best guarantee the optimal deployment of the rescue parachute.
Critical points to watch out for:
- Check the general condition of the container structure: fabric integrity, cleanliness, absence of moisture.
- Make sure that the volume of the container and the reserve parachute match. Adjust it if necessary (adjustment system).
- Check that no part of the container closure is damaged: metal or textile eyelets, locking system, retaining rings, metal needles, magnets, velcro, etc.
- Check that no tool used to close the container (hanger, snap ring) remains in place and does not interfere with the proper functioning.
Handle
The handle is the final element of the rescue parachute packing, and will be the first link in the deployment chain. It is inseparable from the container, whether or not it is integrated into the harness, and whether or not it has a specific pod connected to the handle. It is the handle that will allow the opening (and closing) of the container, the extraction of the pod, and the throwing of the whole assembly that will lead to the deployment of the rescue parachute. It is composed of a gripping ring (variable size and shape), of various elements to lock the container (needles...), and of a strap to connect the gripping ring to the pod. This strap is very important, because it will allow the opening of the container, and an effective throw. If it is too short, the pod and its rescue are pressed against the flaps before the handle can open them fully. Too long, the opening of the container is facilitated but the throw can become less effective because of the large lever arm exerted. Also, once the throw is done, the handle at the end of its strap can more easily get wrapped around the line bundle and slow down (or even prevent) the opening of the pod and the release of the parachute. It is imperative to have the shortest possible connection between the pod and the handle to allow the opening of the container! Depending on the positioning of the pod in the container, the point of attachment of the strap on the pod can play a significant role in this problem. The specific pods bring an optimal solution since the whole "pod - strap - handle" are designed in a way optimized for the container used. Once the handle is in place, the standard relating to the harnesses imposes that the effort to be exerted on it to release the container must be between 2kg and 7kg. This test has been validated on a harness that has passed the EN 1651 standard, but it is always interesting to check if we are still within these values after a certain time, especially on external containers (frontal) that rarely pass these tests. Time may affect some elements of the container locking system, such as the elastic bands, which may lose their stiffness with use and no longer hold the handle firmly enough at rest.
Critical points to watch out for:
- Check that the handle matches the container used.
- Inspect the handle: integrity of the ring, traces of wear, closing system (metal needles, rings, velcro).
- Inspect the connecting strap: integrity of the seams, condition of the strap, cleanliness, traces of wear.
- Make sure that the length of the strap is adequate for its positioning on the pod and the container.
CONCLUSION
If you have to use your rescue in a situation, the last thing you need to do is ask yourself a thousand questions...
- Are my risers securely attached?
- How long has my rescue been packed?
- Will the container open properly?
- ...
That's why it's important to get to know your rescue system well enough to understand it and be able to do most of the operations yourself. This knowledge will also give you the confidence you need in case of real use.
- Observe your equipment, get to know it.
- Ask yourself questions.
- Imagine what could be the problem and try to find an appropriate answer.
Attach your harness to a gantry, sit in it as if you were flying and simulate a pod extraction. It may not be necessary to go all the way to the jettison and open the pod, as this will require a parachute repack. You can, for example, have someone retrieve the pod, and pull the risers out until they are under tension on the connection points. Check that everything is ok, and if not, try to identify the problem and figure out how to fix it. Repeat the operation several times, testing different configurations:
- Grab the handle in different ways.
- Pull the handle in different directions (front, back, up, down, sideways, ...).
- Pull the handle slowly, or quickly.
- Simulate throwing the pod (with your assistant) in different directions to see if the risers come out of the guide easily.
Be a bit paranoid, and consider all the situations to be tested, even the most improbable ones Don't forget that you are quietly installed under a gantry and that you are missing a lot of parameters that are difficult to simulate: emotions, centrifugal force, turbulence, fatigue, ...
The rescue parachute deployment chain involves many links, which must be efficient individually, but also collectively with each other. If you find that certain elements are incompatible with each other, you should not hesitate to invest quickly in suitable equipment. Nothing should be left to chance.
When in doubt, it is obviously recommended to contact professionals for advice and guidance.
Choose the size of the parachute keeping at least 15% margin with the maximum weight indicated by the manufacturer. There are indeed big differences in air density depending on altitude and temperature. The measurements taken during the homologation are brought back to sea level and calculated in standard air. The most difficult thing to do in a loss of control situation is to decide to pull your parachute. If you must pull, remember one thing: throw as hard as possible and outside. Doing regular control handles, packing your parachute every 3 months is the best way to save precious seconds.
